Installing a Zaptec Go 2 with Laddboxkillarna in Uppsala
We finally pulled the trigger on a home EV charger for our Uppsala townhouse, and after researching the local options we decided to work with Laddboxkillarna to do the install. They're one of Sweden's largest dedicated EV-charger installers — founded in 2021 by two electricians, now with 40+ certified staff and over 30 000 installations completed across the country.
The install was straightforward. One of their certified electricians (Magnus) arrived at 07:45 (15 minutes ahead of schedule), walked me through the plan, executed the entire job — fuse box upgrade, exterior and interior cable routing, mounting the Zaptec Go 2 charger and Perific load balancer, and configuring everything in the apps — and was driving away by 10:30.
There's a lot of marketing-speak around EV-charger installs in Sweden but very little detailed first-person documentation in English, so here's the complete walkthrough of how it actually went, every step Magnus took, the products we ended up with, and how to use the grön teknik Skatteverket tax reduction to get 50 percent off the bill.
- Laddboxkillarna — Sweden's largest dedicated EV-charger installer, 30 000+ installs, 40+ certified electricians, founded 2021
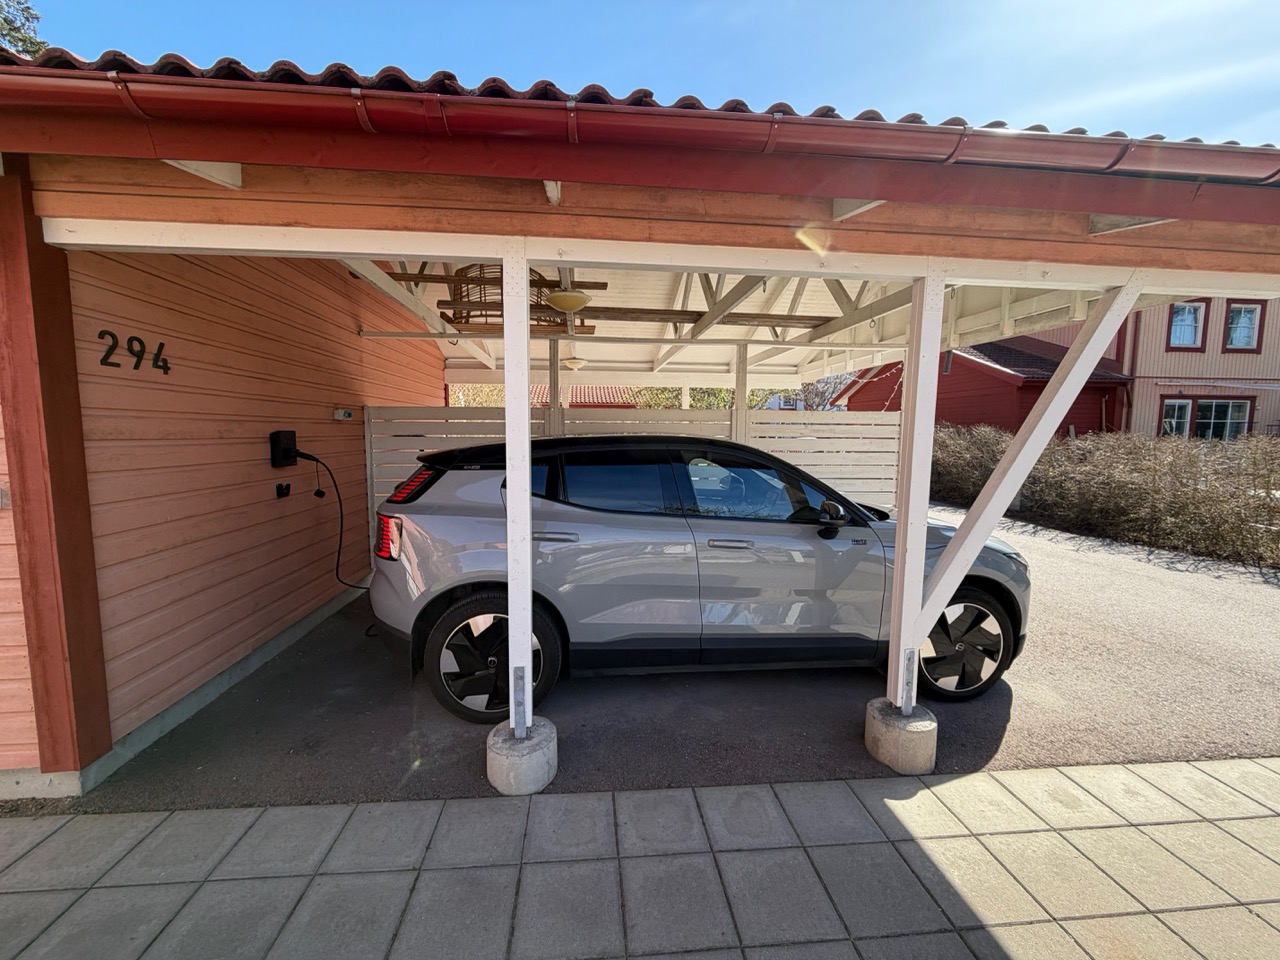
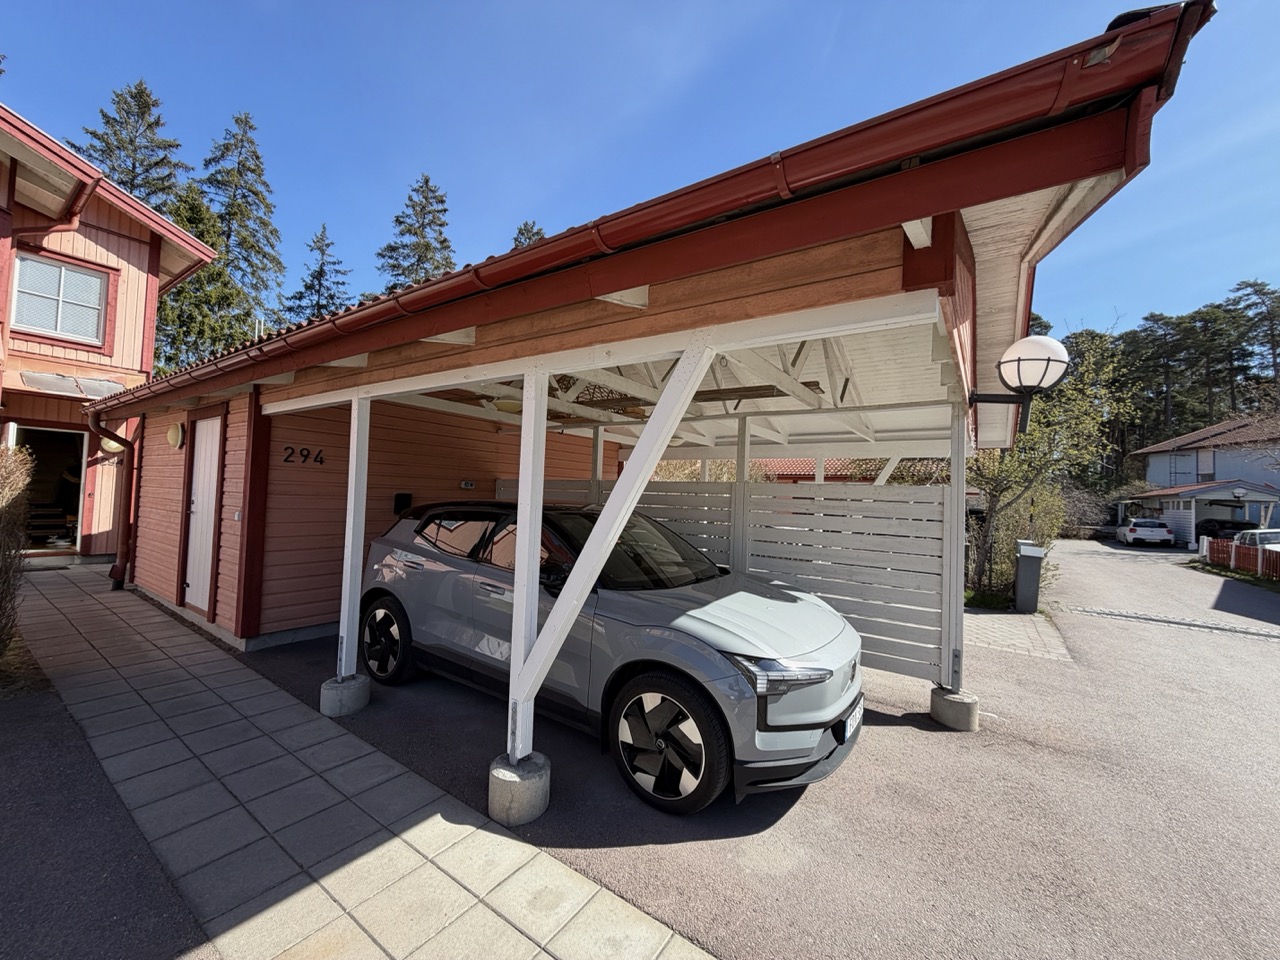
- Installed: Zaptec Go 2 wallbox + Perific load balancer, mounted on the carport wall
- Fuse upgrade: main fuses bumped from 16A to 20A to sustain 11 kW three-phase charging
- Skatteverket grön teknik: 50 percent tax reduction applied automatically by the installer (max 50 000 SEK/year/person)
- Total time on site: 2 hours 45 minutes (arrival 07:45 → done 10:30), including ~30 minutes of app configuration
- The Vattenfall integration schedules charging to the cheapest hourly spot prices automatically via the load balancer
Why We Chose Laddboxkillarna
When you start searching for EV charger installation in Sweden, the field splits into three categories: general electricians who add EV charging to their list of services, hardware-specific installers tied to one brand (Zaptec, Wallbox, Easee, etc.), and dedicated EV-charger specialists. Laddboxkillarna is the third category — they only install EV chargers, and they install most major brands rather than being tied to one.
The numbers told most of the story. From their own company overview:
- 40+ certified electricians on staff (not subcontractors)
- 10+ years of combined industry experience
- 30 000+ installations completed across Sweden
- 99% customer satisfaction rating on Reco
- Coverage in every major city, plans to expand across Scandinavia
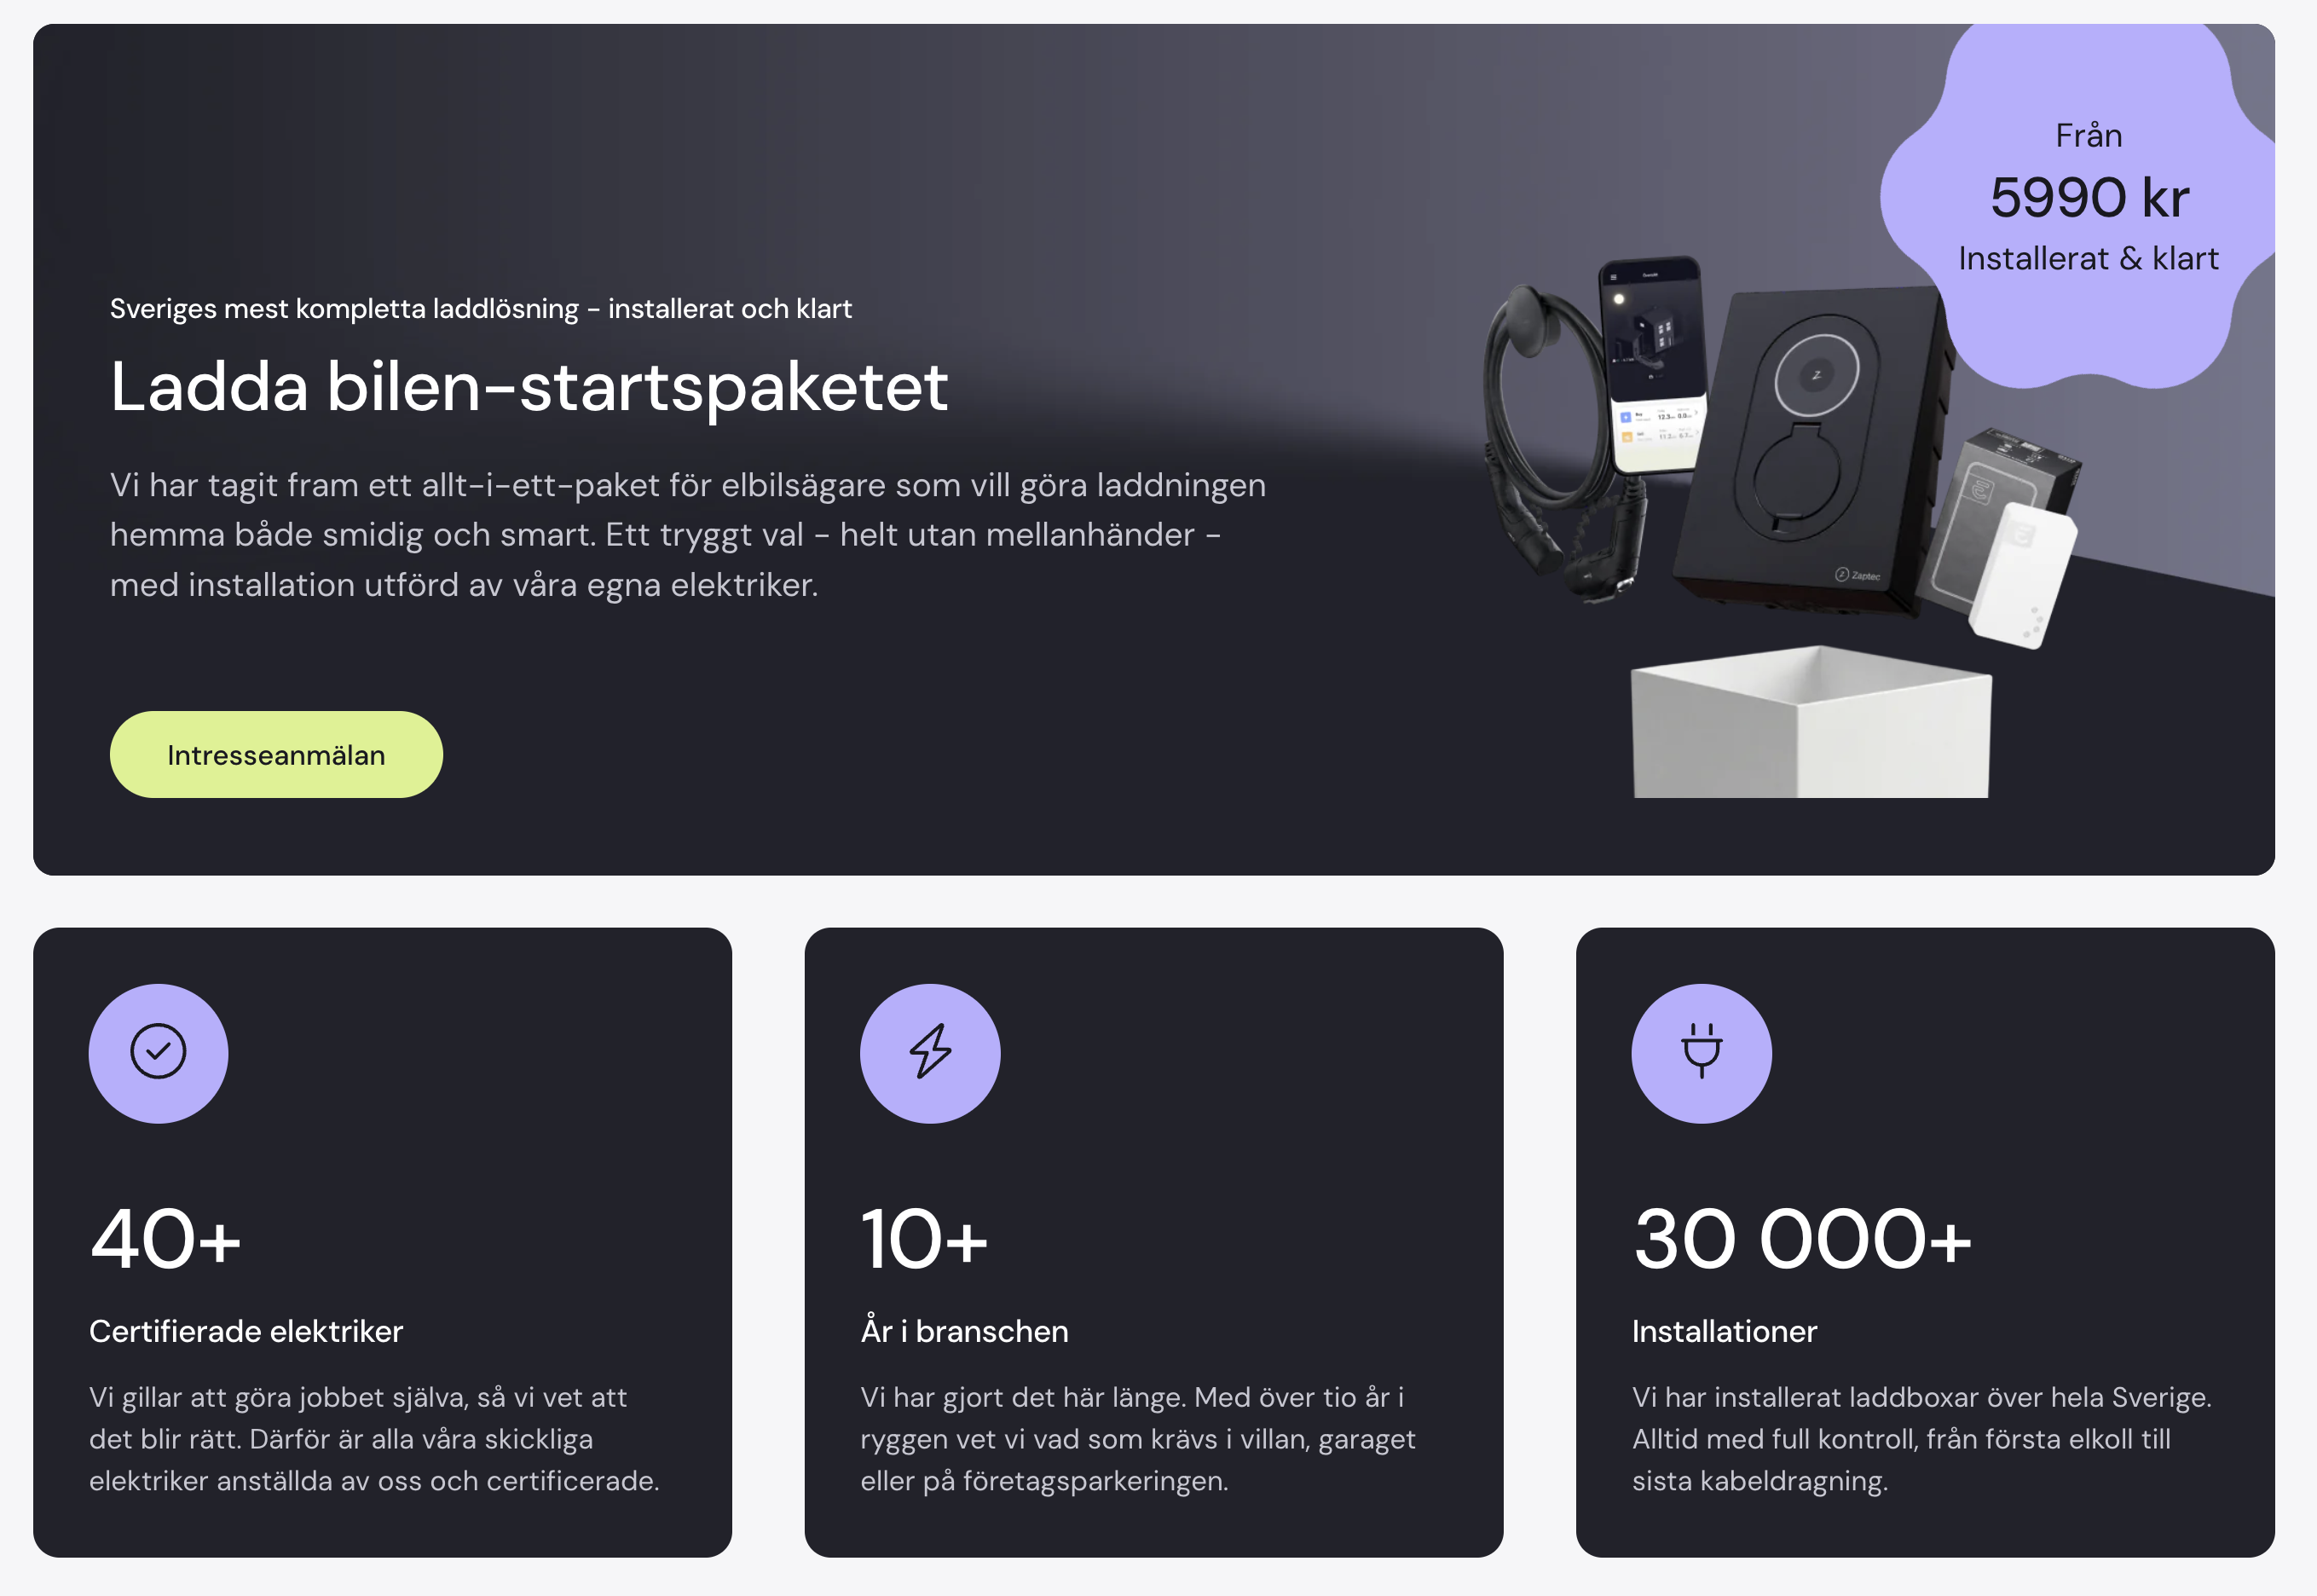
The starter package is the headline offer: from 5 990 SEK fully installed and ready (price after the grön teknik 50 percent reduction). That includes a wallbox, the cabling, the labor, and the warranty — and at that price point it's competitive with DIY-ish installs you'd cobble together yourself for almost as much money and significantly more risk.
The decision came down to one practical factor: Laddboxkillarna's electricians are full-time employees rather than subcontractors. For a job that involves opening your house's main fuse box and modifying the grid connection, I wanted someone who works on this every single day — not a general electrician for whom EV chargers are one of fifty things they touch.
What We Ordered: Zaptec Go 2 + Perific Load Balancer
The hardware split into two boxes:
- Zaptec Go 2 wallbox — a Norwegian-designed three-phase charger up to 22 kW (in our case wired for 11 kW), with built-in Wi-Fi and 4G, RFID authentication, native Apple Wallet support, and integration with major Swedish utilities for smart spot-price charging
- Perific load balancer — a small dynamic load management unit that sits inside the main fuse box and continuously measures household current draw. When the house approaches its main fuse limit, it automatically throttles the charger so the fuse doesn't blow. It also exposes your charging to the utility's smart scheduling
You can do an EV install without a load balancer if you have plenty of headroom on your main fuse — but the moment you want to combine fast charging with normal use of an induction stove, an oven, and a heat pump (the standard Swedish appliance trio), the load balancer earns its place. It's also what enables the cheap-spot-price scheduling that turns "EV charger" into "EV charger that saves you several hundred SEK per month".
The Install — Start to Finish
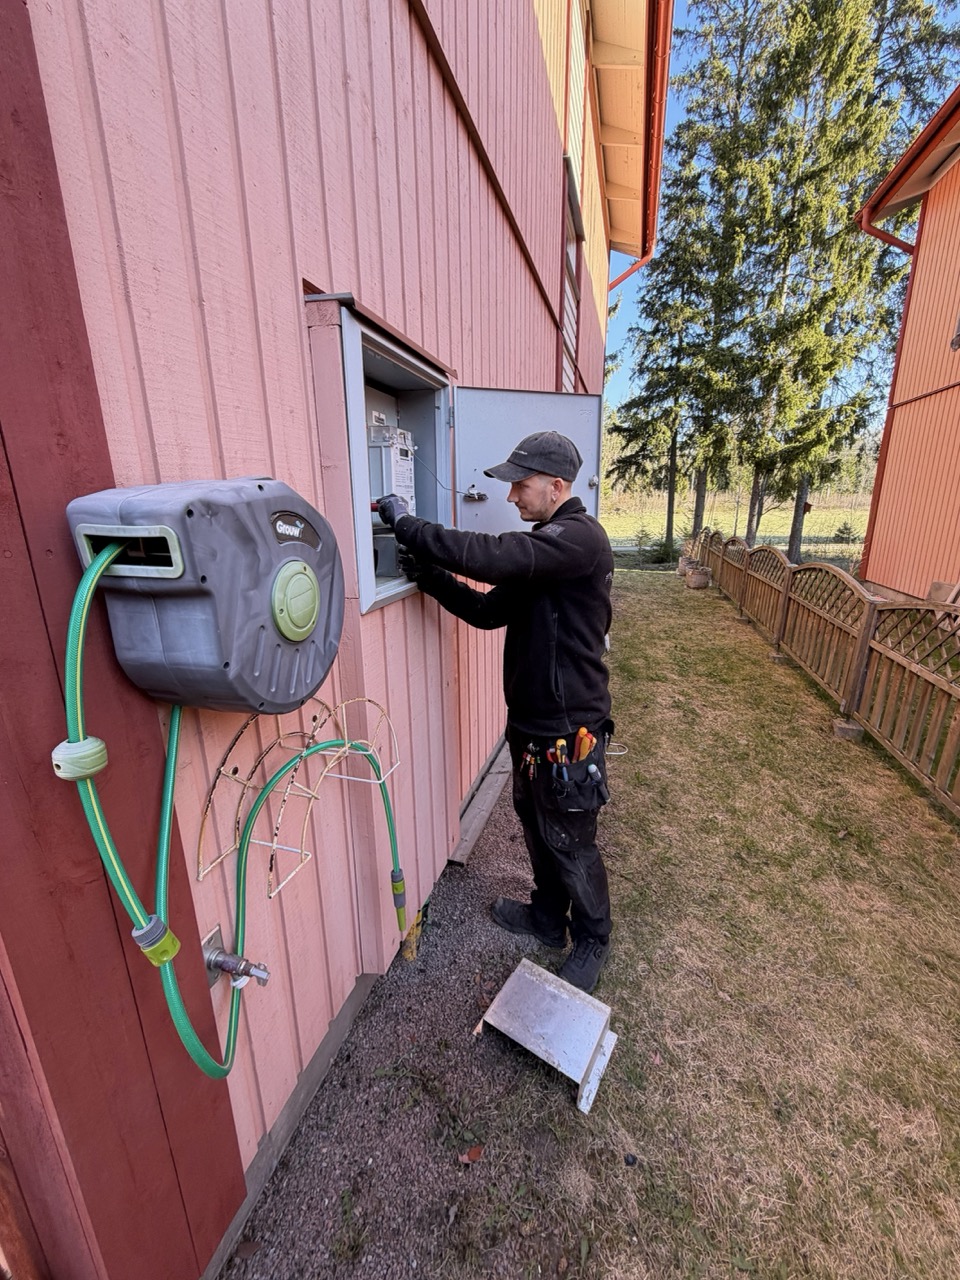
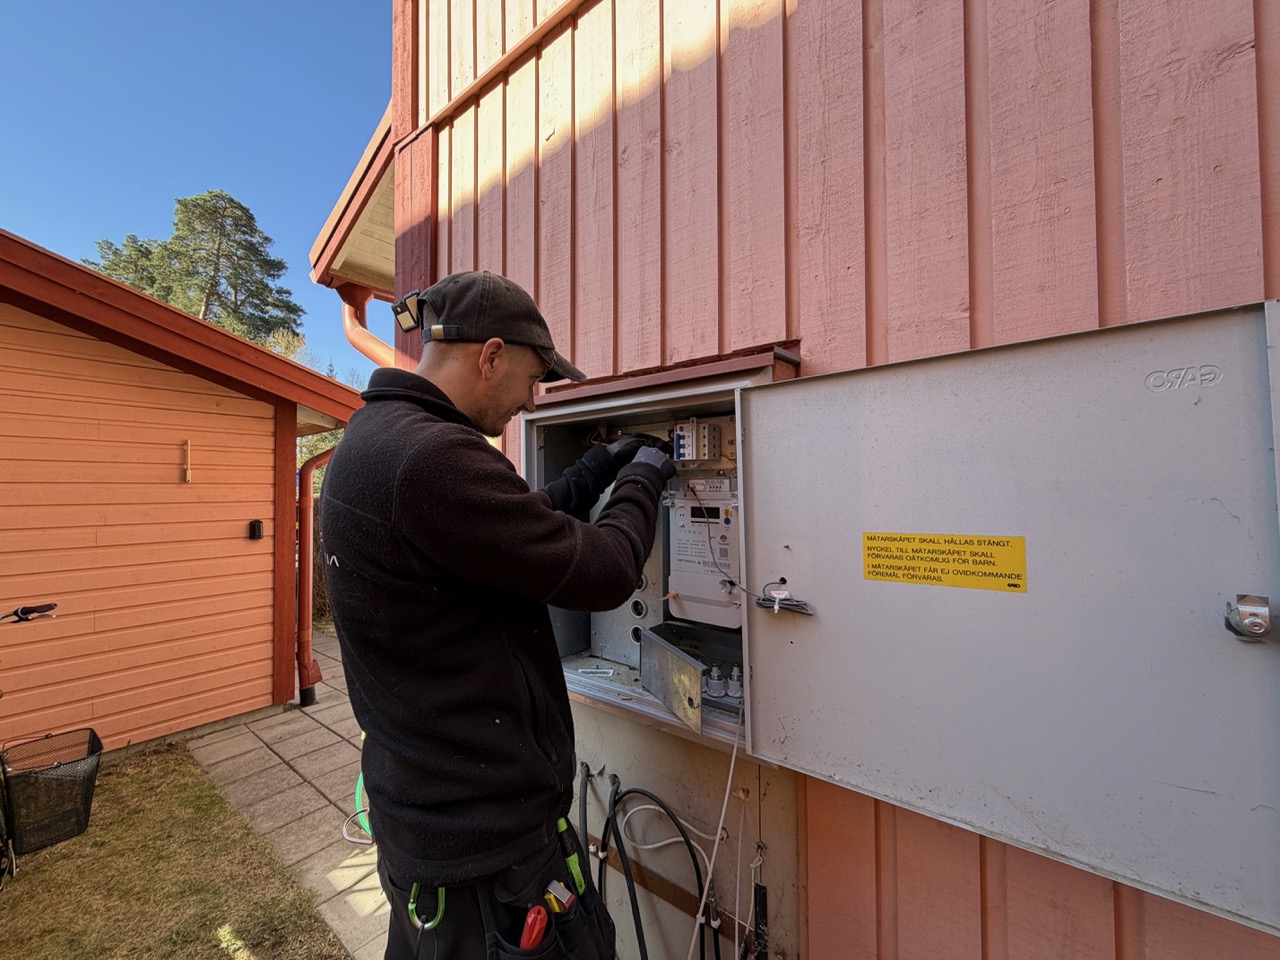
07:45 — Magnus Arrives 15 Minutes Early
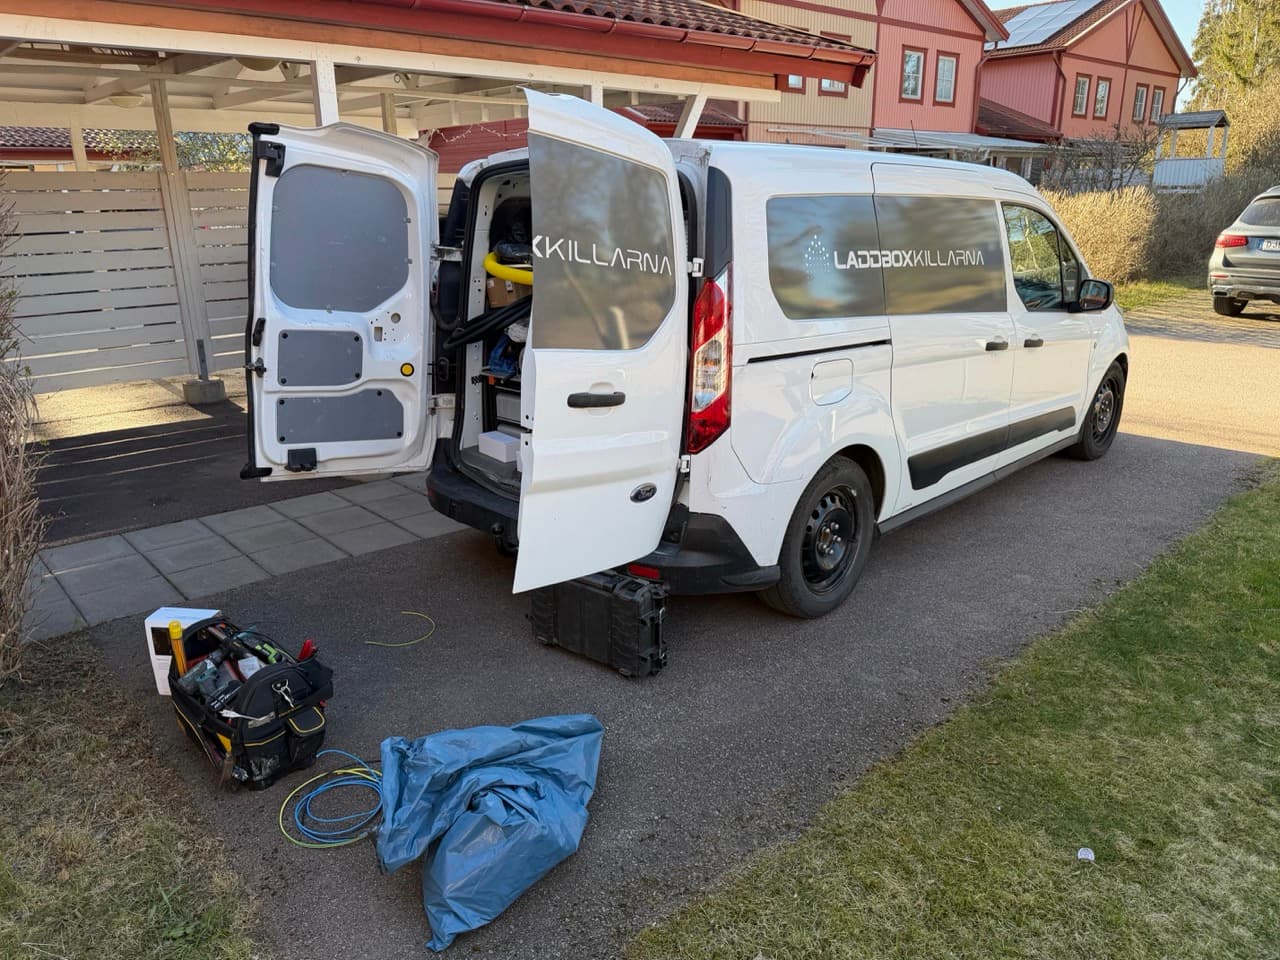
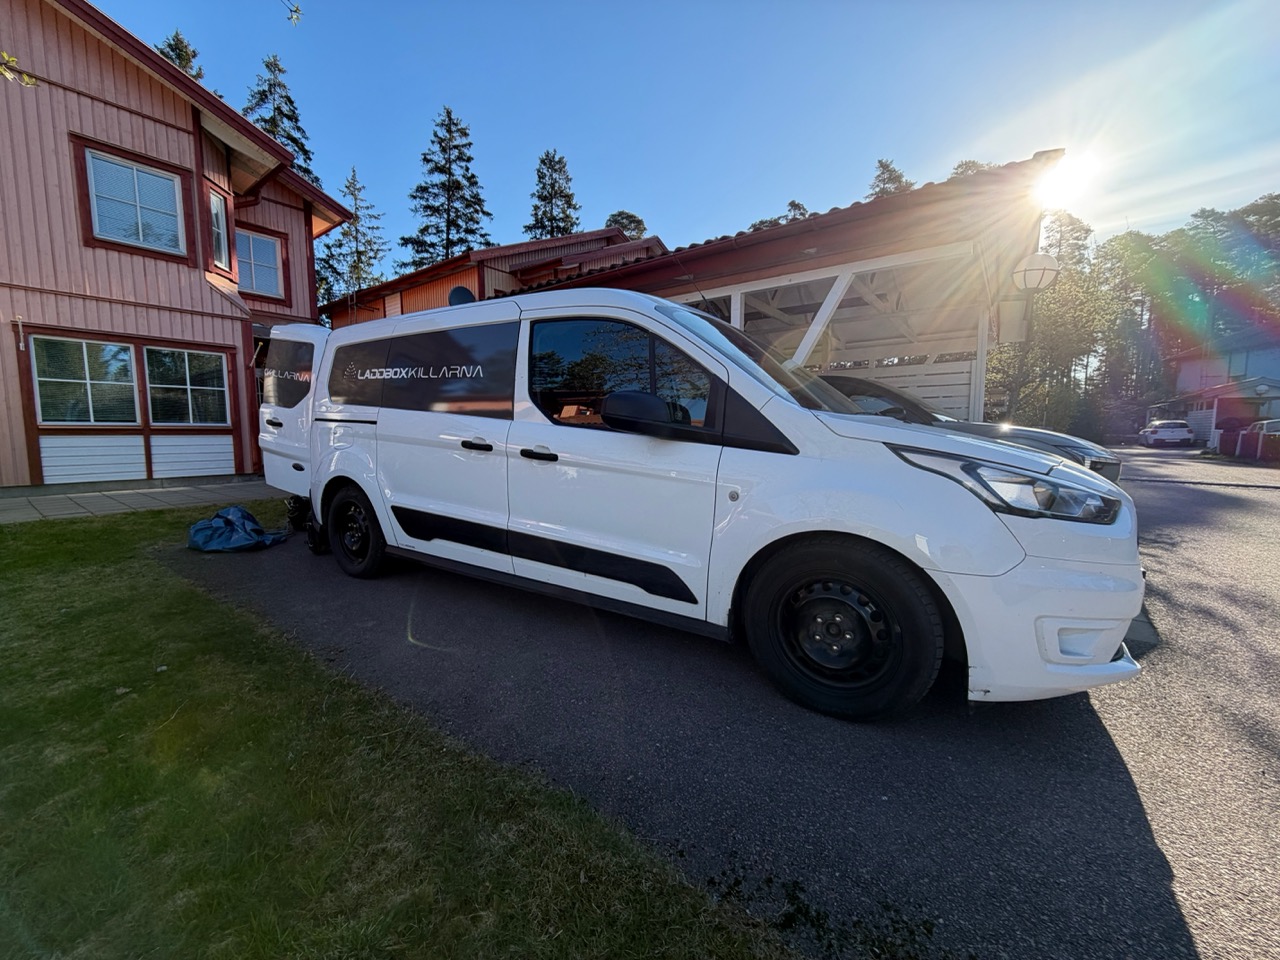
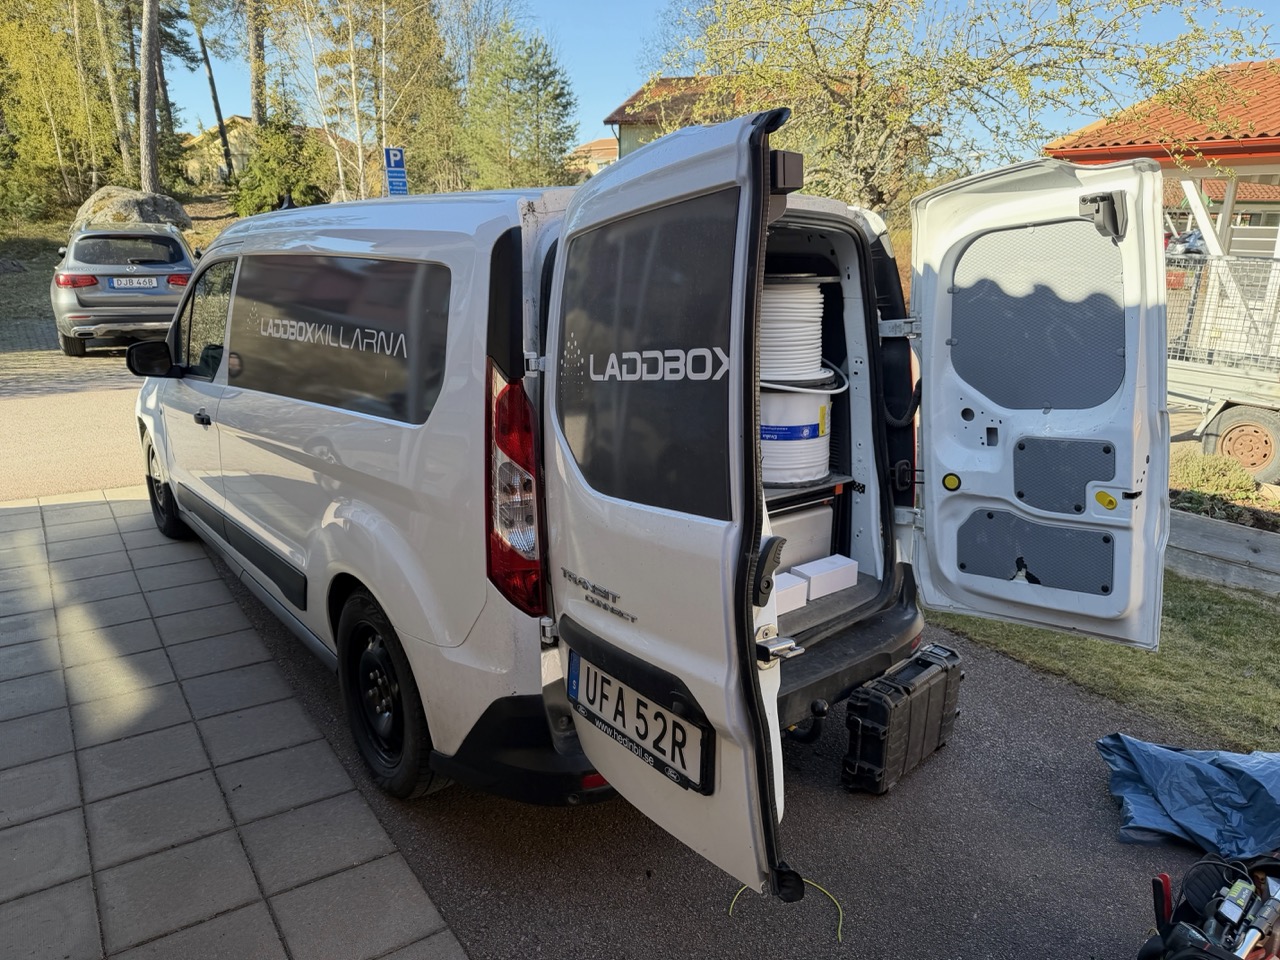
Magnus pulled into the driveway at 07:45 on the dot — 15 minutes before our scheduled 08:00 start. Both the early arrival and the morning light made the first impression: a clean Laddboxkillarna van, tools laid out on a tarp before knocking on the door, no rushed energy.

The first half-hour was almost entirely conversation. Magnus walked me through what was going to happen: where the fuse box was, where we wanted the charger mounted, what cable route we'd use, what would have to be opened and closed up, and roughly how long each phase would take. No assumed knowledge, no condescension — just a clear explanation of the work ahead. This level of upfront communication isn't something I take for granted after a decade of dealing with various tradespeople.
Step 1: Site Assessment — Fuse Box and Storage Room
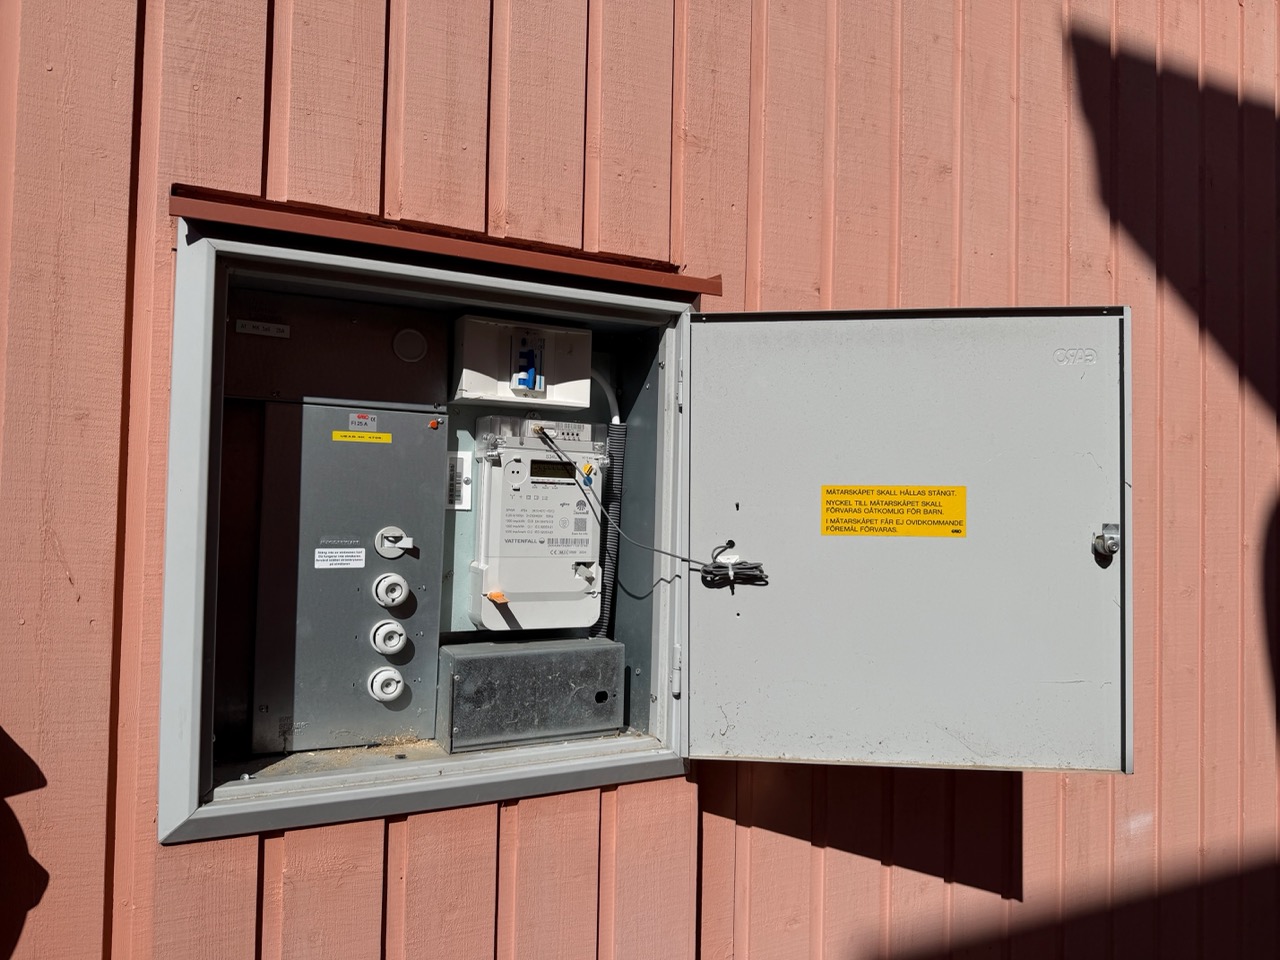
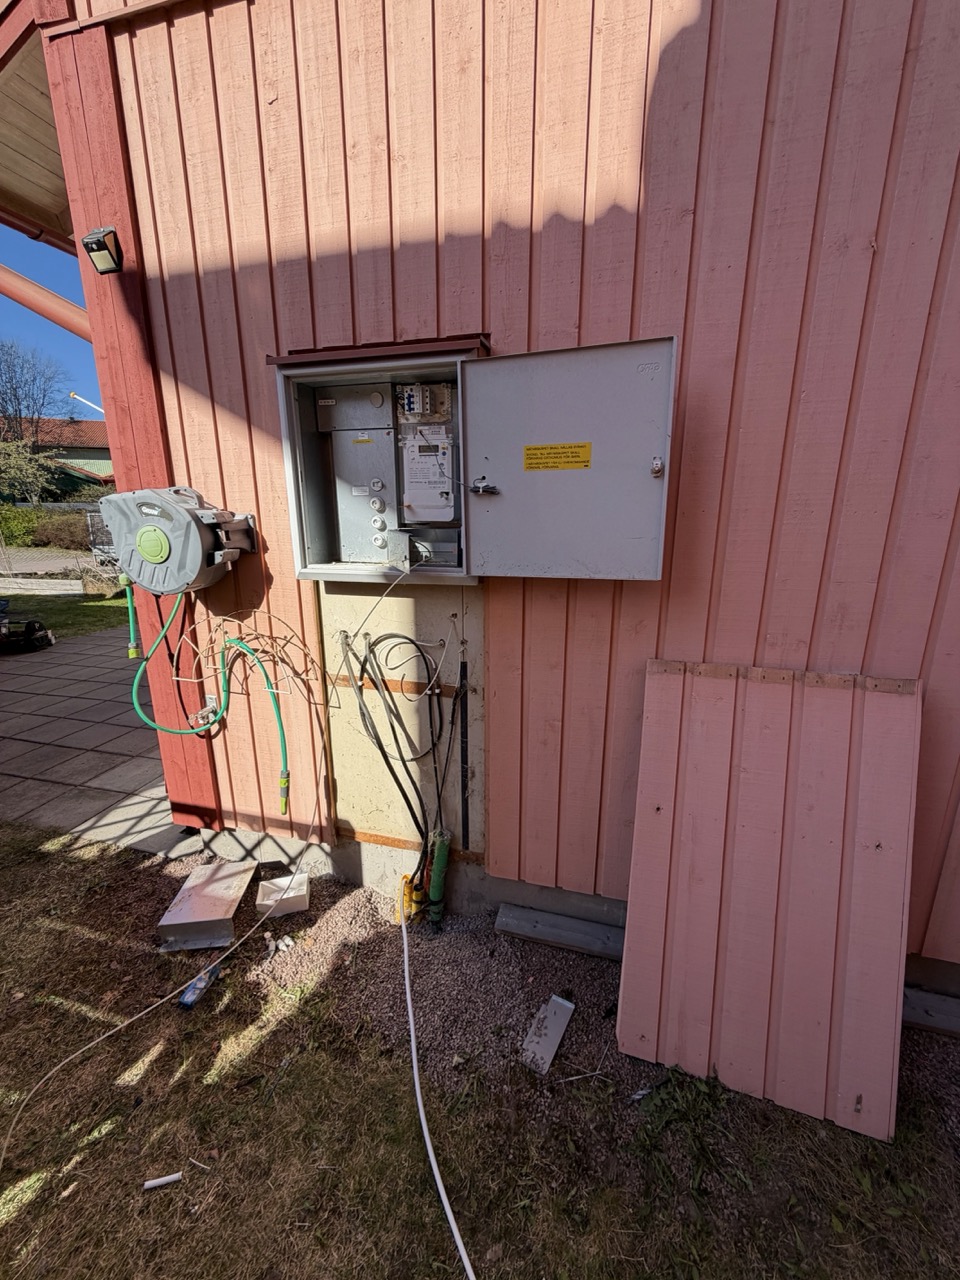
The first concrete step was understanding the cable path. Our fuse box (mätarskåp) is on the side of the house, the carport where the charger would mount is at the front, and between them sits the storage room that runs along the side wall.
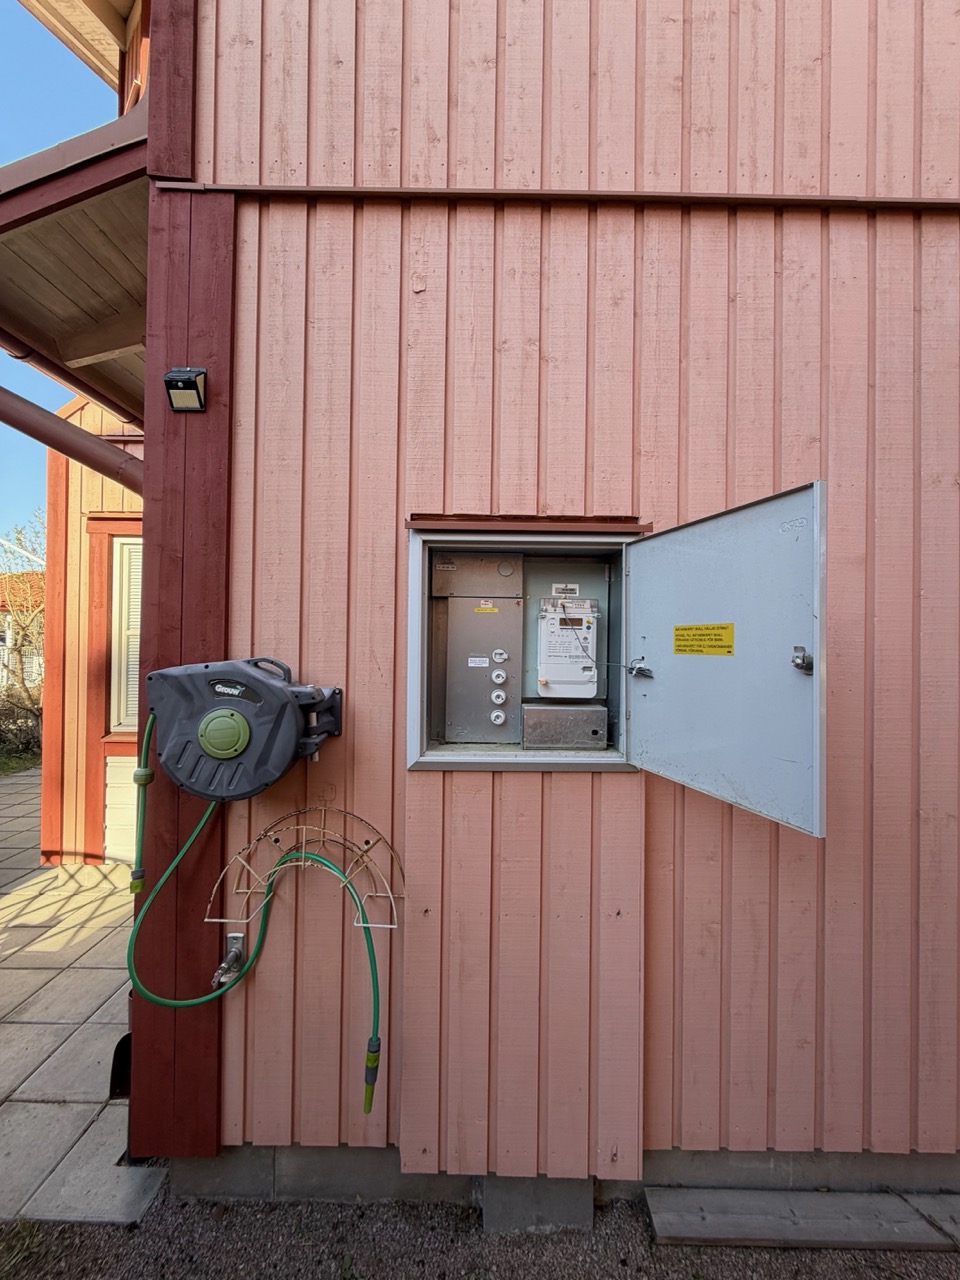
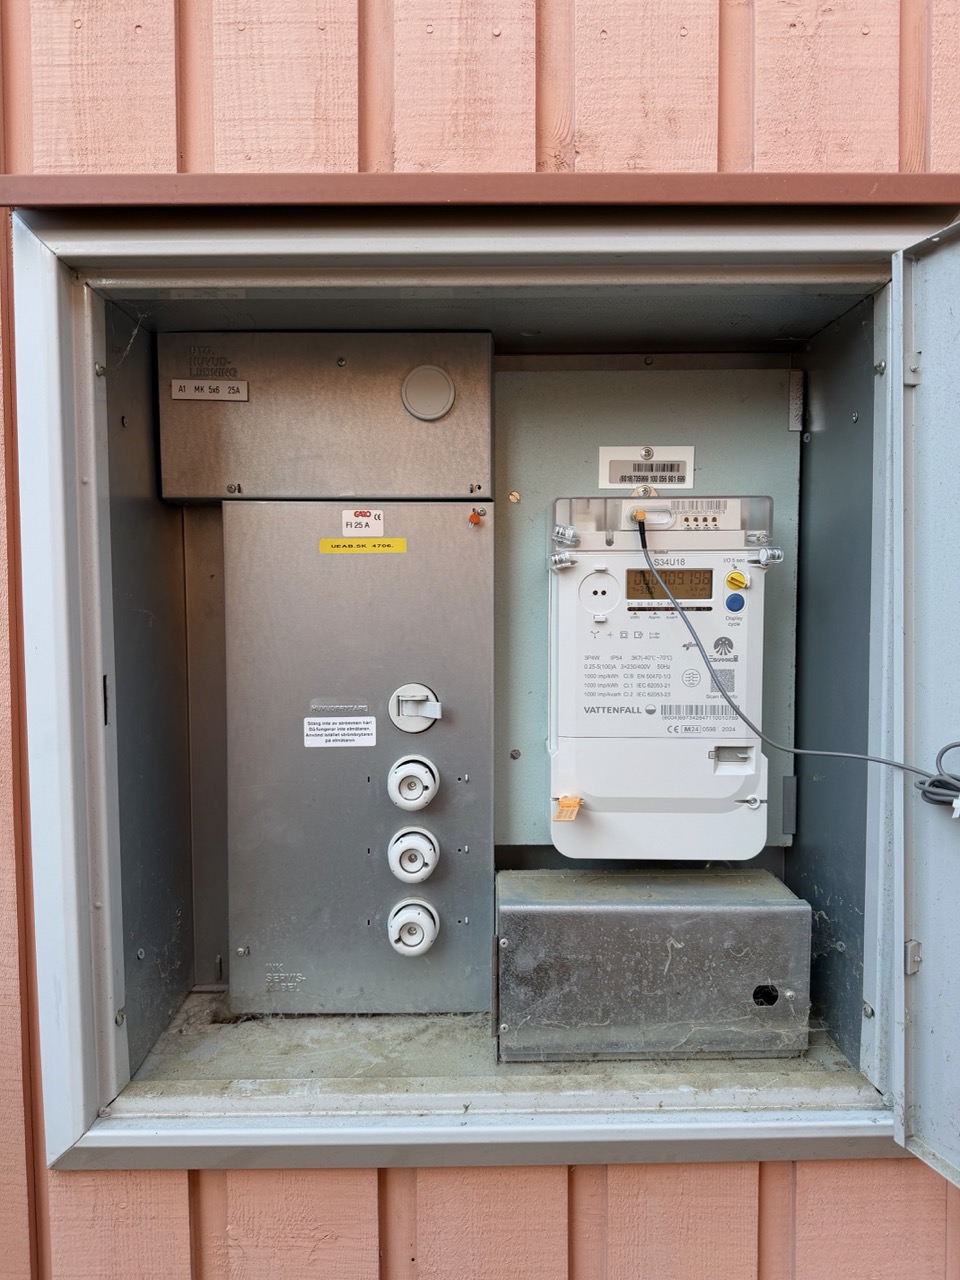
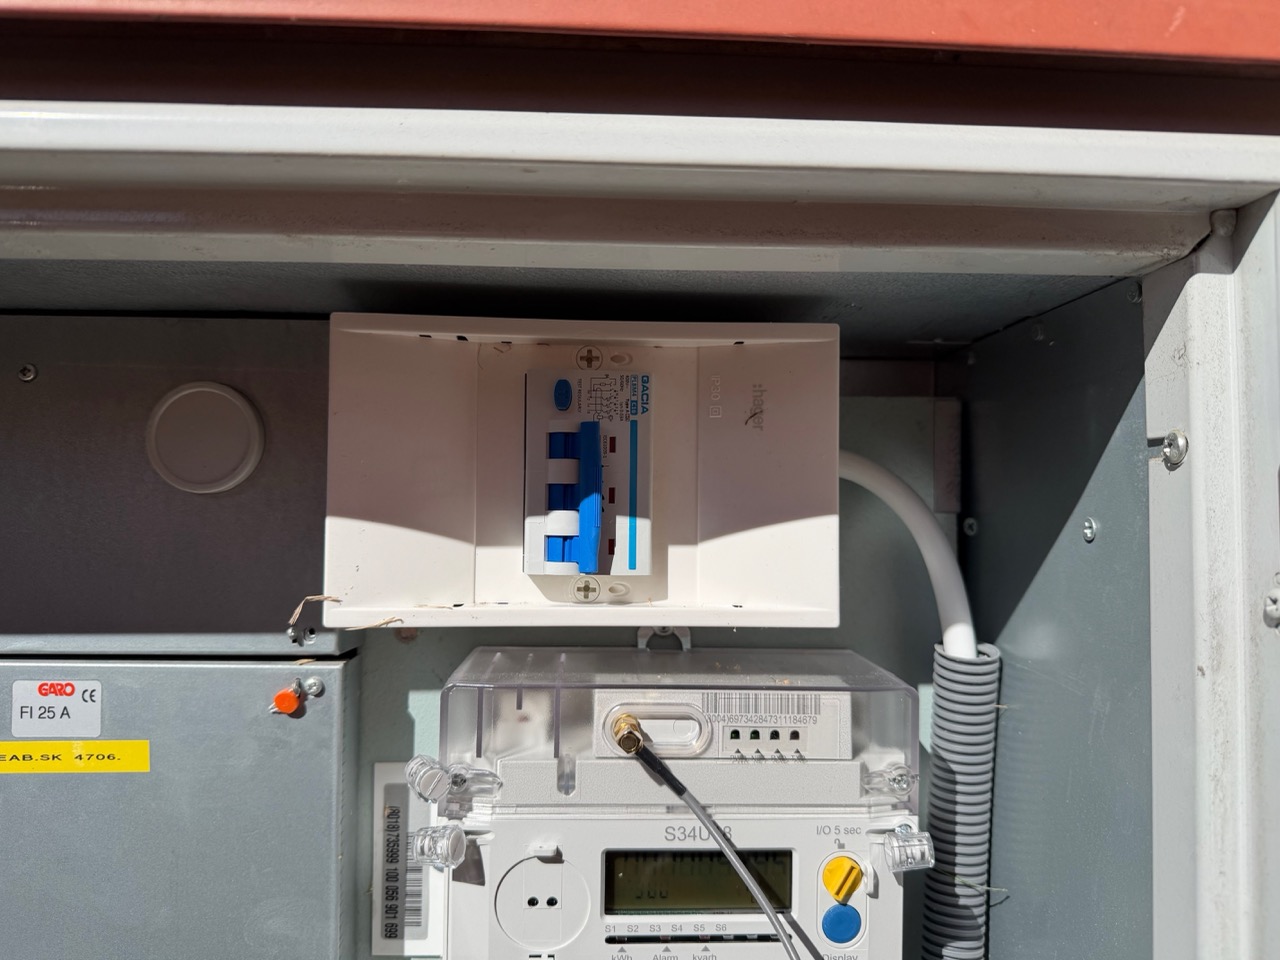
The fuse box itself was a standard Swedish Vattenfall setup: a smart meter (S34U18) on the right, a 25A residual-current device (FI 25A), and three 16A ceramic main fuses on the left. The 16A fuses were the first thing Magnus flagged — sustained 11 kW three-phase charging would need 20A to leave headroom for normal household use. We agreed to upgrade them as part of the install (which costs extra).
The path through the storage room was the part I was most curious about. There were a few options — running cable along the exterior wall, drilling new holes through interior walls, or routing through an existing conduit. Magnus immediately spotted that there was an existing pipe (tomrör) running from the fuse box, through the storage room wall, and toward the center of the room. It was hidden under a wooden cover that had been nailed in place during the original build.
The fact that this pipe existed and had enough room to pull a new cable through saved us probably an hour of additional work. This is exactly the kind of thing where having an experienced EV-specialist installer pays off — they recognize these shortcuts on sight.
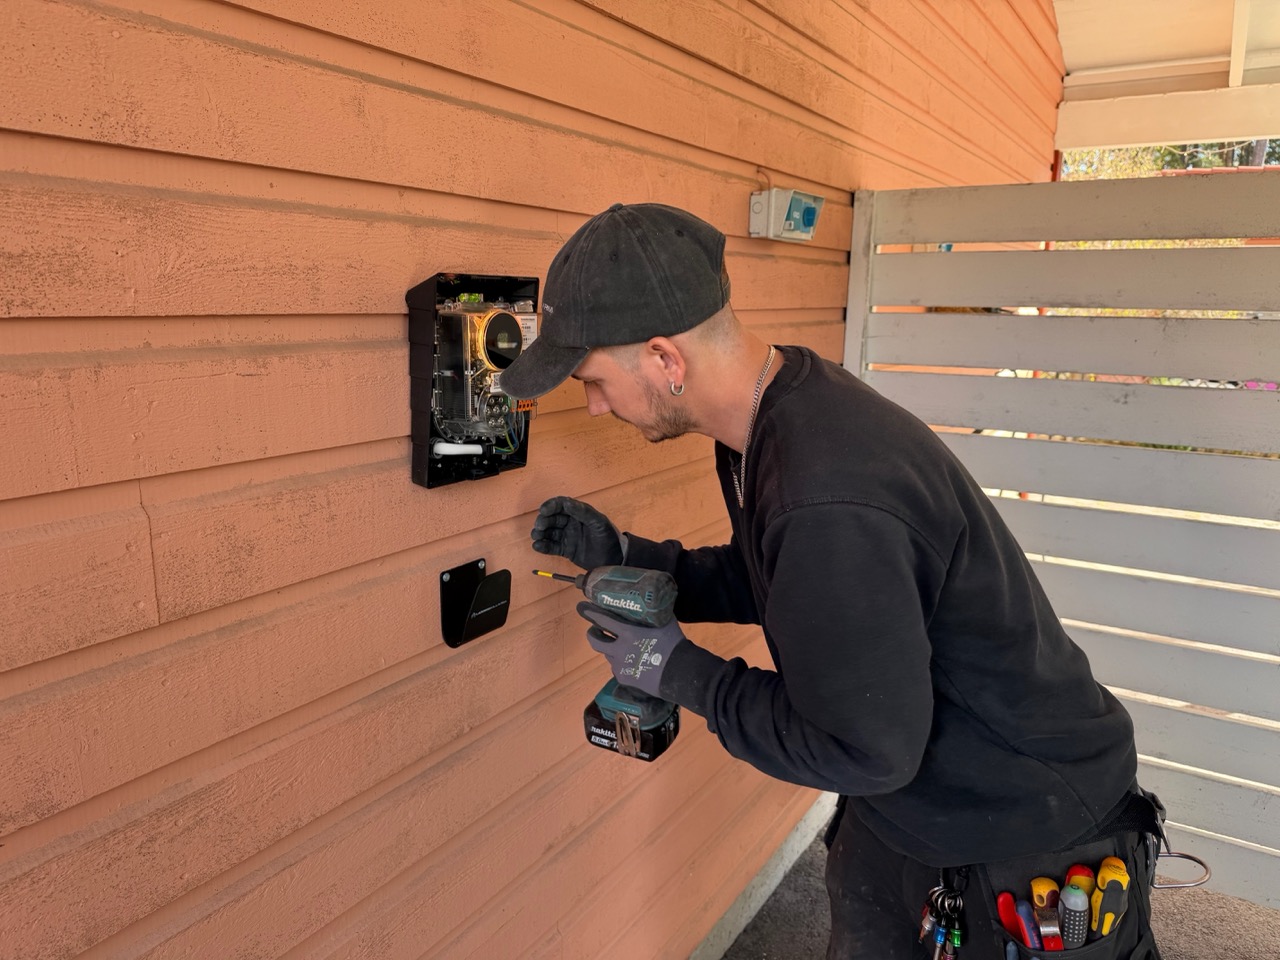
Step 2: Opening the Fuse Box and Planning the Connection
With the cable route decided, Magnus opened the fuse box properly and started laying out the new connections.
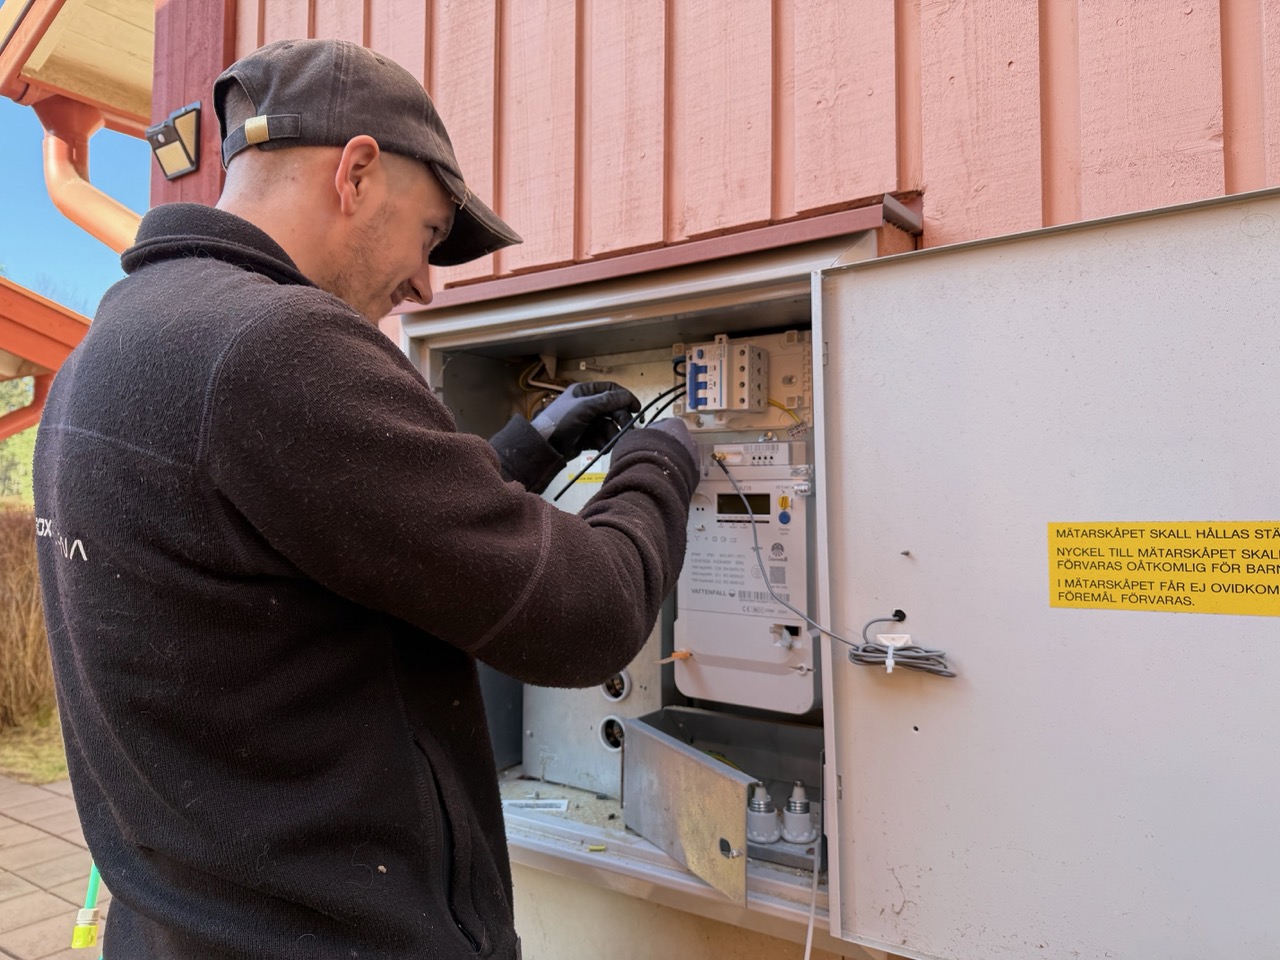
Step 3: Upgrading the Main Fuses (16A → 20A)
Before any new wiring went in, Magnus replaced the original 16A ceramic fuses with new 20A Hager three-phase breakers. The fuse upgrade is the foundation for everything that follows — without it, the new EV circuit would trip the main fuse the first time the oven and the charger pulled current together.
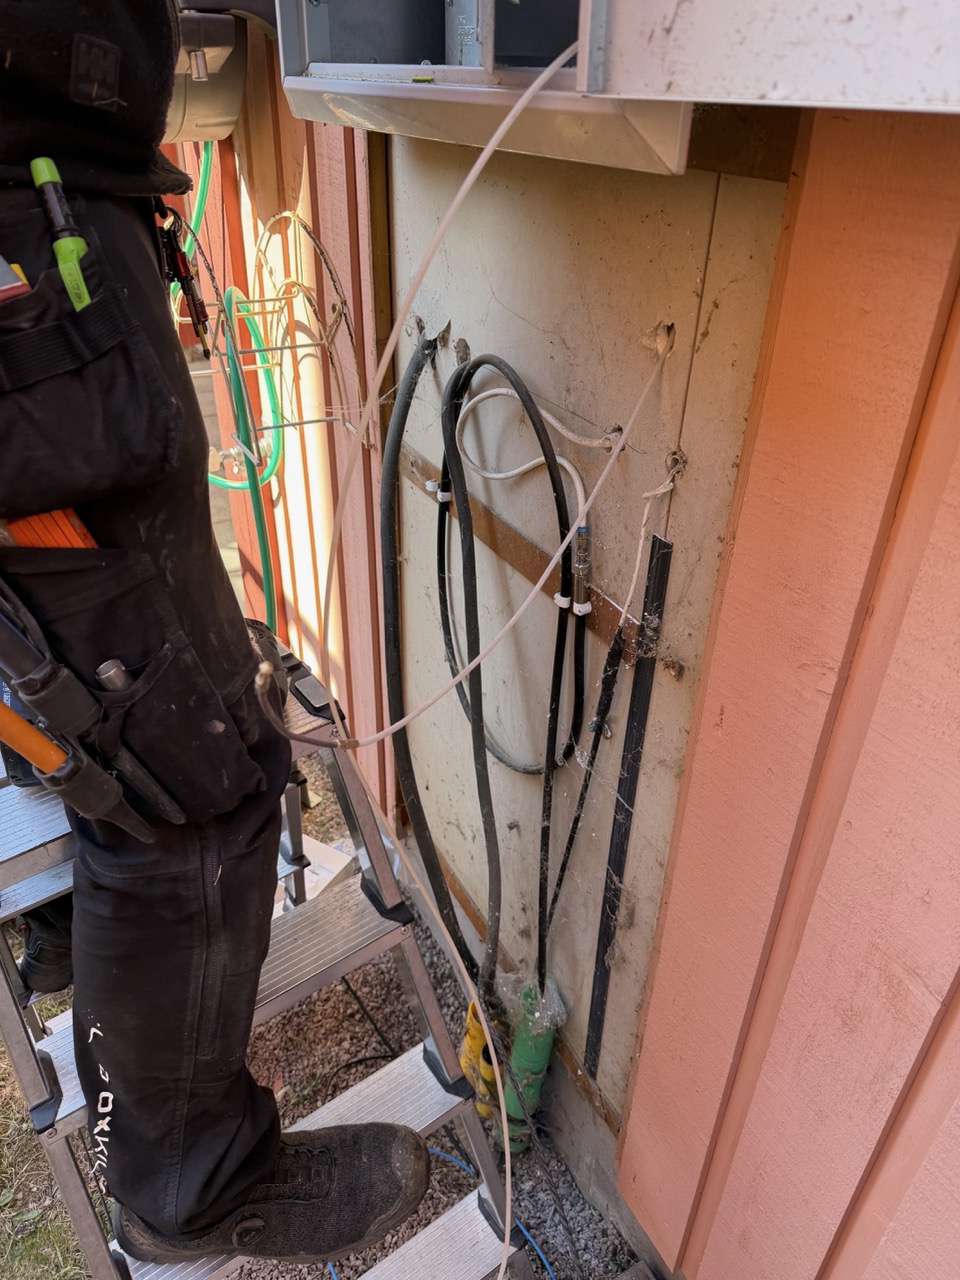
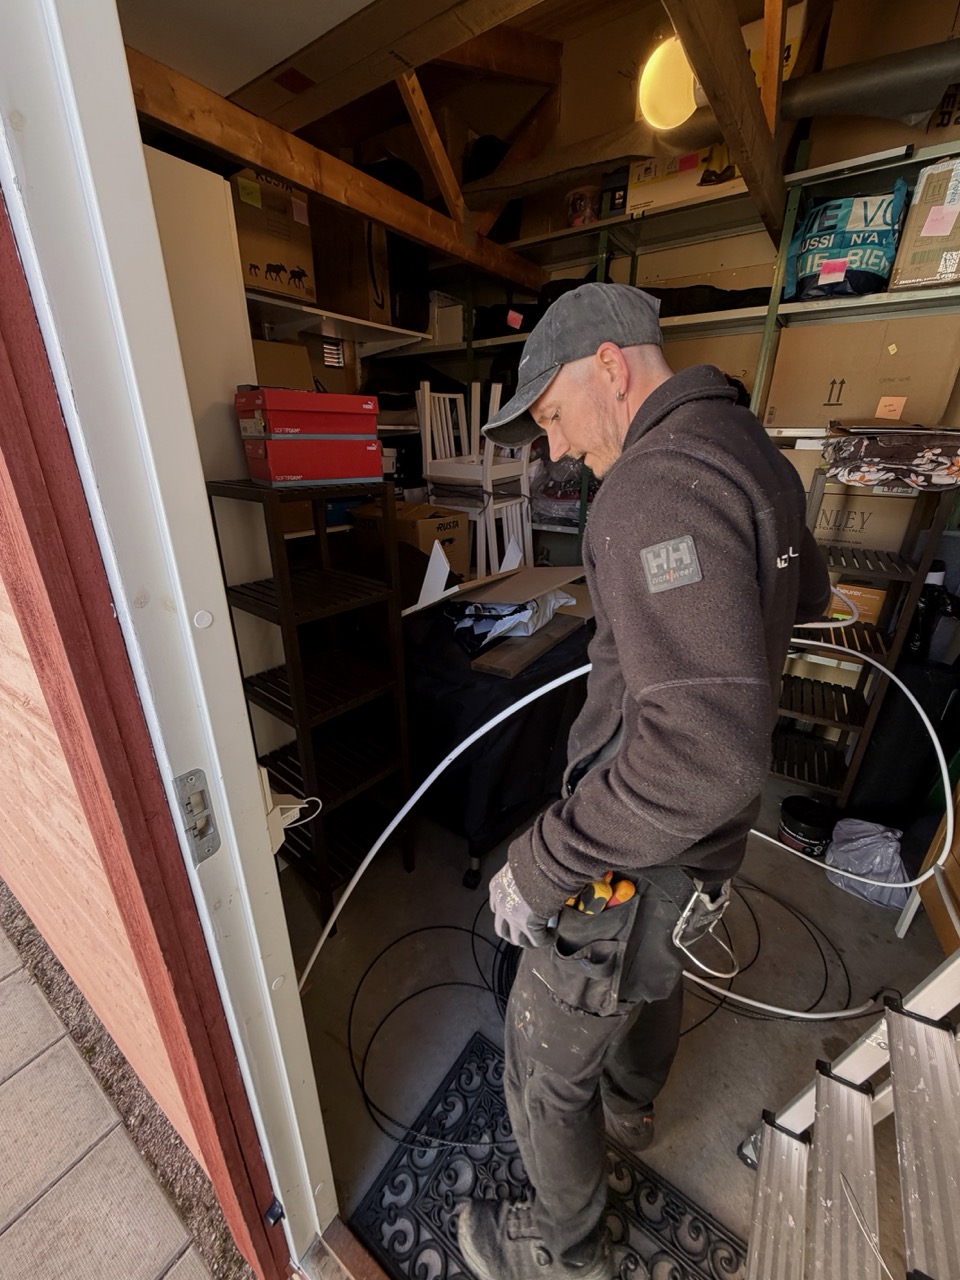
Step 4: Pulling Cable from the Fuse Box to the Storage Room
With the fuse box ready, Magnus moved outside to pull the new three-phase cable through the existing conduit. He set up a ladder at the fuse box, fed the cable down through the conduit on the exterior wall, and then through the buried section that connects to the storage room.
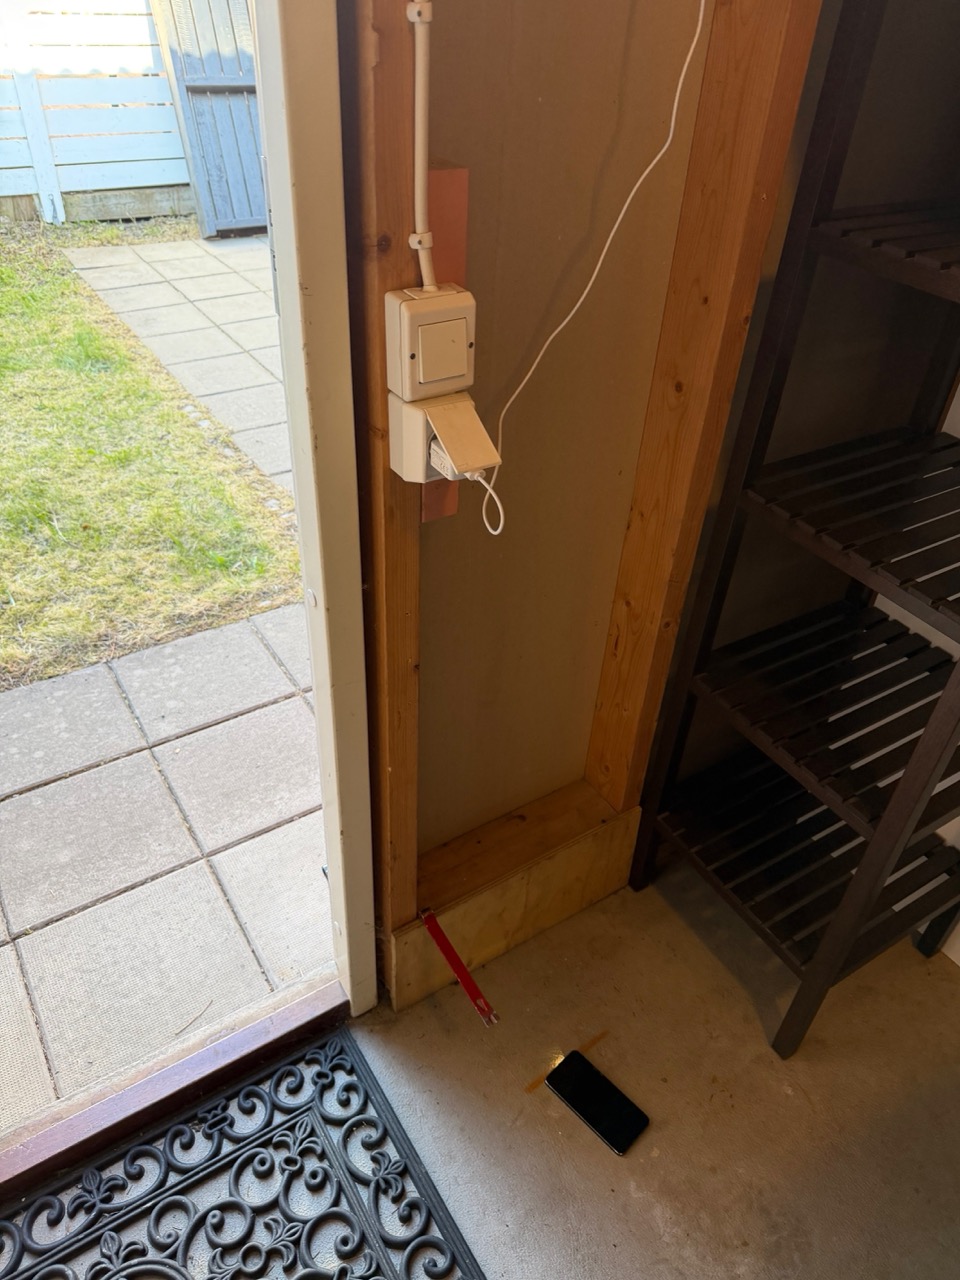
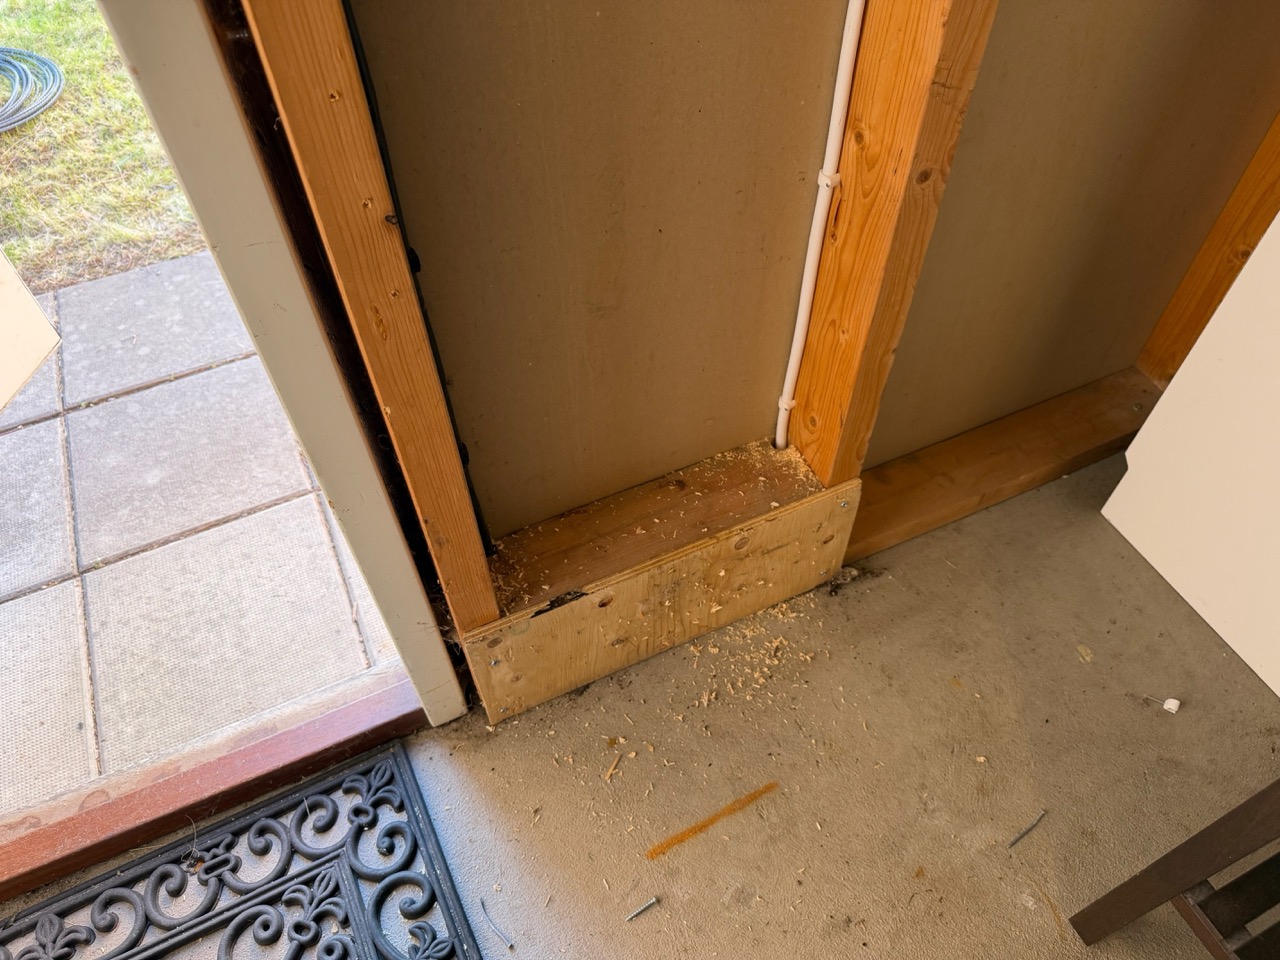
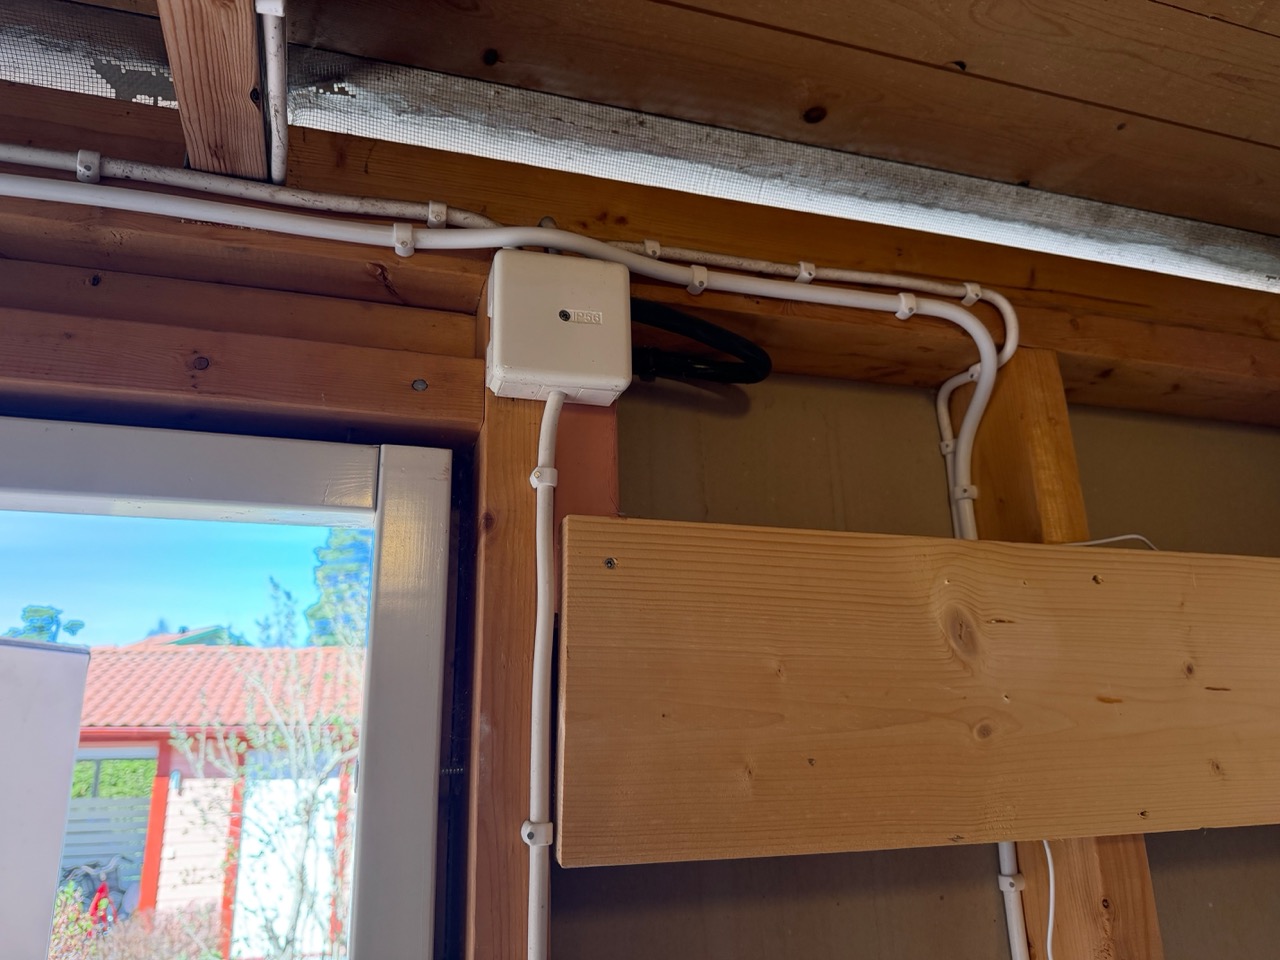
Step 5: Routing Through the Storage Room
Inside the storage room, the pipe that runs from the fuse box surfaces under a wooden cover near the door. That cover had been nailed in during construction — Magnus had to carefully pry it up to expose the conduit. The sawdust on the floor in the photo below tells you how much was needed.
Step 6: Installing the Perific Load Balancer
With the main cable in place, Magnus mounted the Perific load balancer in its own enclosure on the exterior wall near the fuse box. The load balancer needs to sit close to the main meter so it can read household current draw in real time and adjust charging power accordingly.
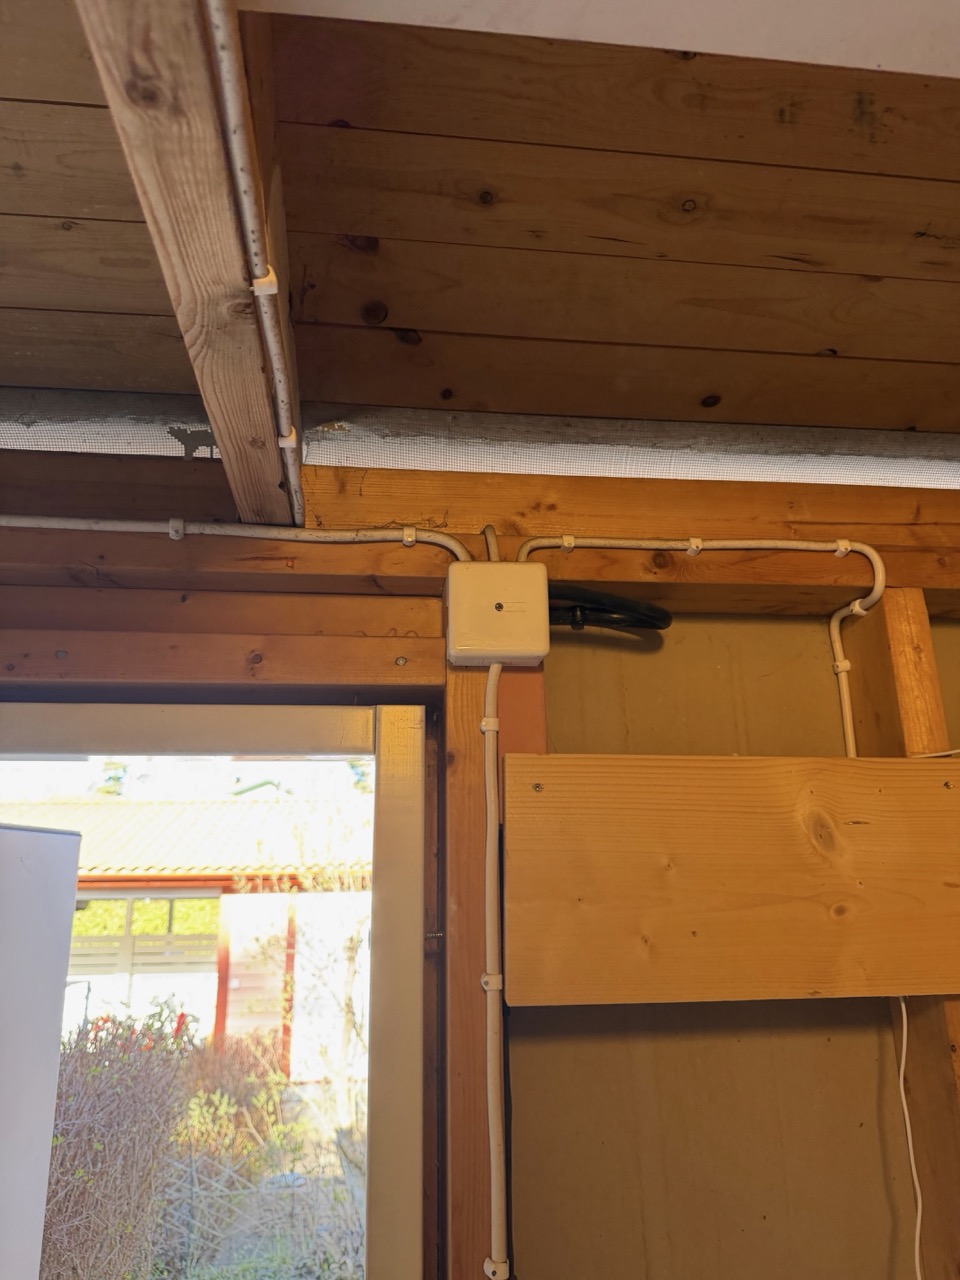
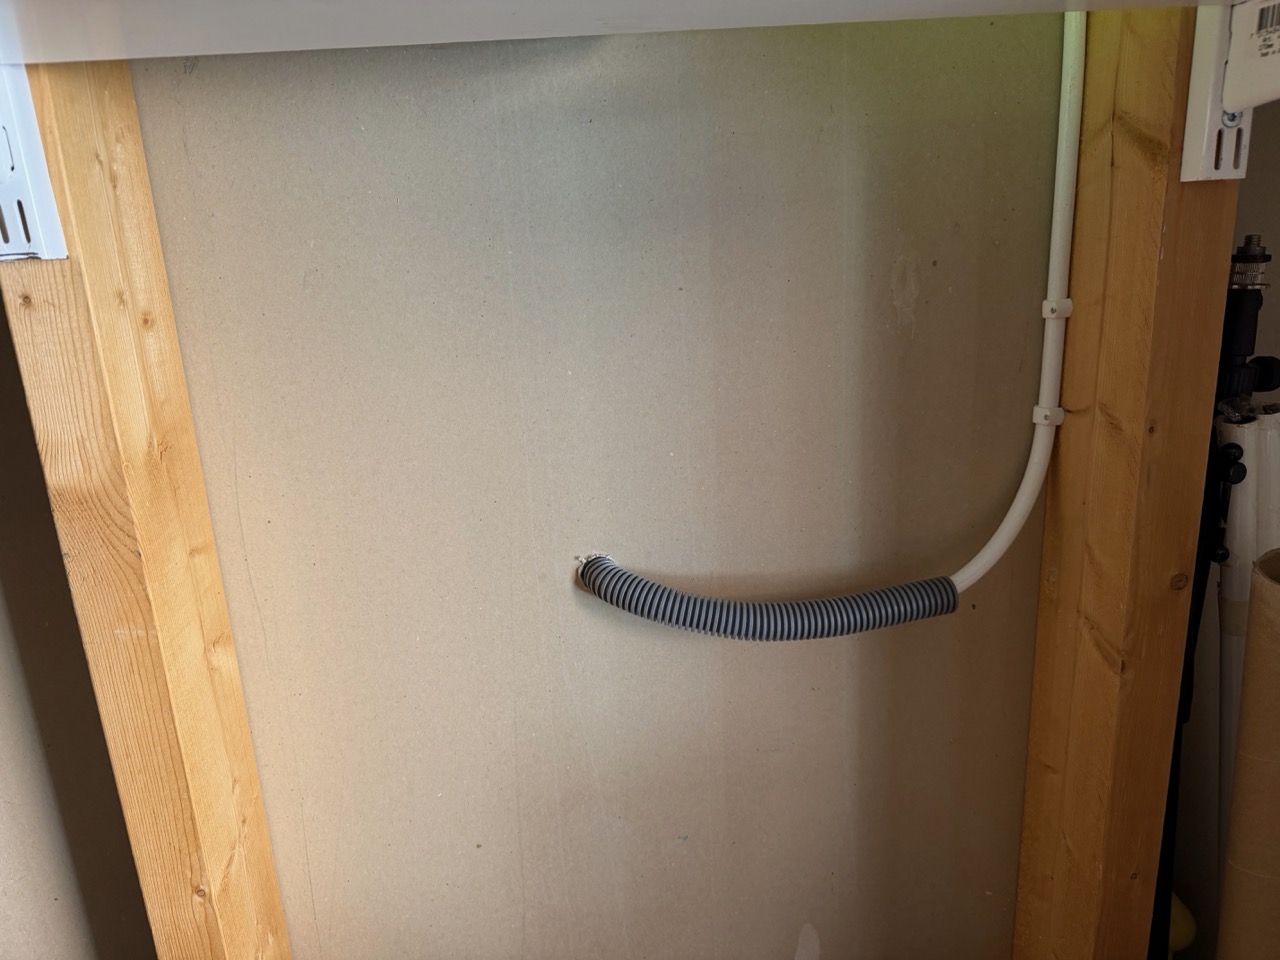
Step 7: Tidying the Storage Room Cabling
Before mounting the charger itself, Magnus went back inside and cleaned up the cabling along the storage room ceiling — clipping it cleanly to existing supports, routing it tightly along the beams, and making sure nothing was loose or hanging. The before-and-after comparison with the earlier ceiling shot is striking: it looks like it was always there.
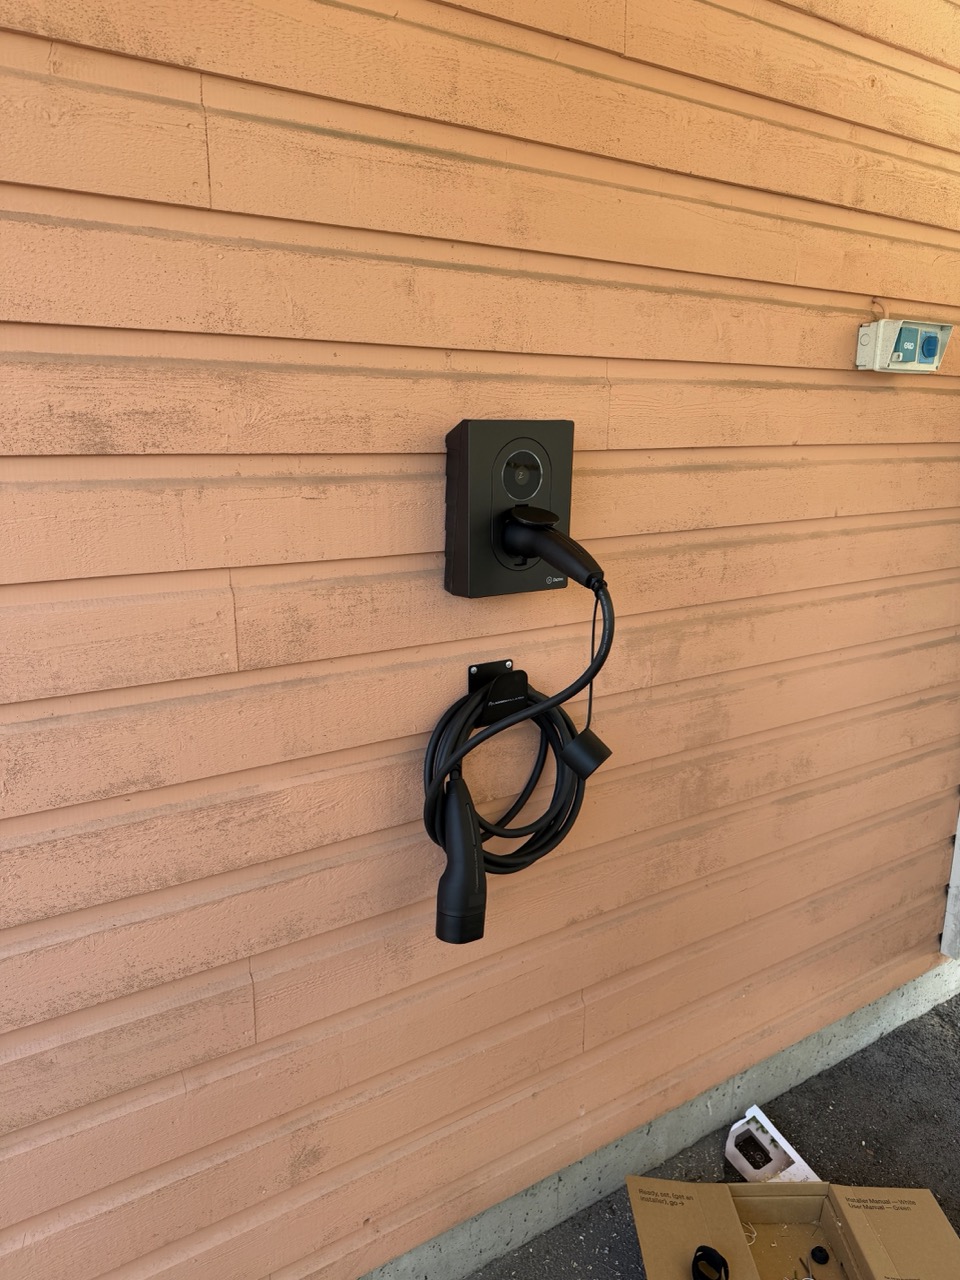
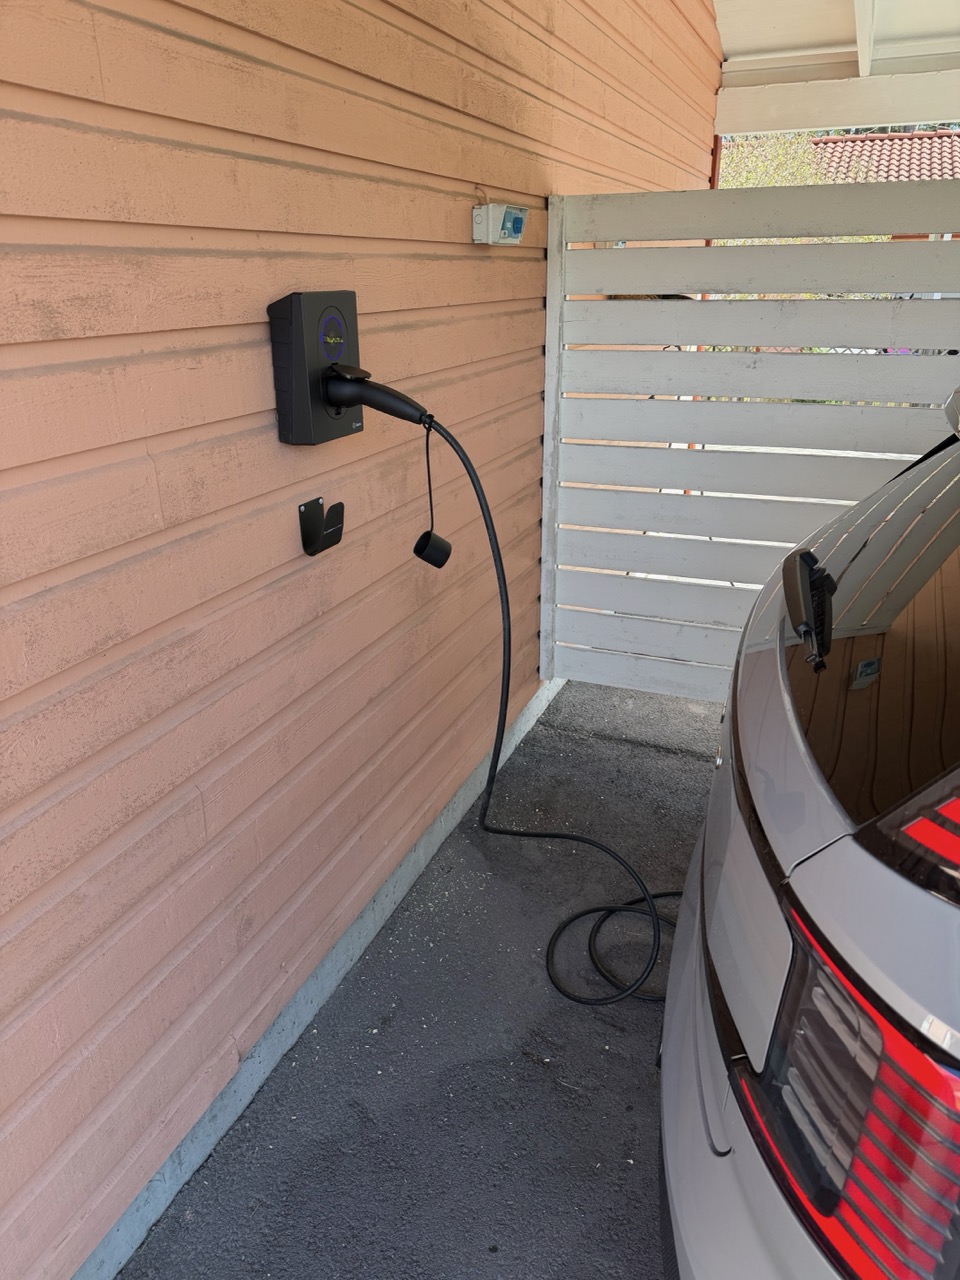
Step 8: Mounting the Zaptec Go 2
The final hardware step was the charger itself. Magnus drilled the mounting holes on the carport wall, attached the mounting plate, connected the three-phase cable, and clicked the Zaptec Go 2 into place.
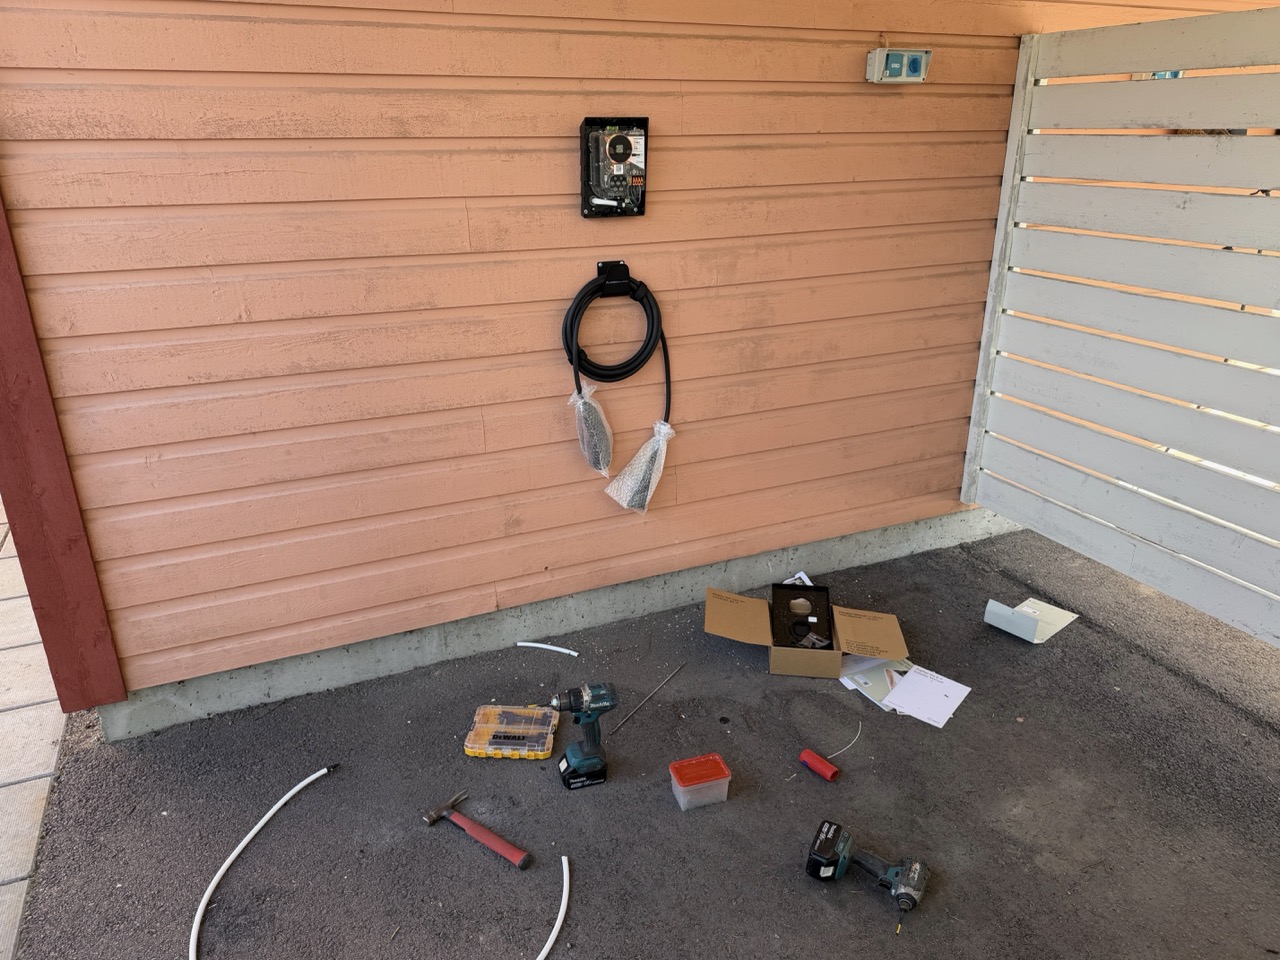
Step 9: Cleanup
By the time Magnus had connected everything, the work area looked exactly like it had at 07:45 — minus the new hardware. Tools packed back into the van, sawdust swept up, removed wooden cover screwed back into place, fuse box closed and locked.

The thing I keep coming back to about working with Laddboxkillarna is that "professional" wasn't just punctuality and skill — it was that the workspace at 10:30 looked indistinguishable from the workspace at 07:45 (with the obvious addition of a wallbox). That respect for the customer's space is the difference between someone who installs occasionally and someone who installs every day.
App Setup and Configuration (~30 Minutes)
The hardware was done. Then came what surprised me as the longest single phase of the visit: app configuration. Magnus walked me through every step of pairing both the charger and the load balancer to my phone, creating the accounts, and connecting everything to my utility.
The Zaptec Go 2 App
- Charger connected via Wi-Fi — the Go 2 has both Wi-Fi and 4G, but we connected it to the house Wi-Fi for the lower-latency control
- Created my Zaptec account and was added as the primary user on the charger
- Tested charging with a phone-app trigger to confirm the install was working end-to-end before Magnus left
The Perific Load Balancer App
- Paired the load balancer to its own app and account
- Confirmed real-time current reading from the meter was flowing into the load balancer correctly
- Set the main fuse value in the app (20A) so the load balancer knows the household limit
Vattenfall Integration for Smart Charging
This was the one I was most curious about. The load balancer integrates with Vattenfall to schedule charging during the cheapest hourly spot-price windows automatically.
- Connected my Vattenfall account through the Perific app
- Enabled EV charging under the smart charging section of the Vattenfall account
- Confirmed the integration — the load balancer now sees tomorrow's hourly spot prices and can shift charging to the cheapest windows
Security and Access Control
Magnus also walked me through the security settings, which are easy to skip and easy to regret skipping:
- App-only authorization — a plugged-in cable does nothing without an authorized phone nearby
- Scheduled charging hours — set windows where charging is allowed (mostly overnight for cheap rates)
- Cable lock — the Zaptec Go 2 can mechanically lock the cable in the port so it can't be removed mid-charge
For anyone in a residential street where strangers might walk past — or worse, plug in opportunistically — these settings are not optional.
The Skatteverket Grön Teknik Tax Reduction (50% Off)
This is the part that turns the install math from "annoying capital expense" into "fair value". Sweden has a tax reduction called grön teknik ("green technology") that covers EV charging installation directly.
The mechanics:
- 50 percent reduction on the cost of labor and materials for EV charging point (laddpunkt för elbil) installation
- Maximum 50 000 SEK per person per year (you can spread across multiple installs in one year if you have unused headroom)
- You don't apply yourself. The certified installer applies on your behalf and you pay only the reduced amount upfront. Skatteverket later reimburses the installer for the remaining 50 percent
- Requirements: you must own the property, use it as a primary or vacation home (permanentbostad eller fritidsbostad), and be tax-resident in Sweden
This is why Laddboxkillarna's starter package can be advertised at 5 990 SEK installed — that's the price after the grön teknik reduction. The pre-reduction list price is closer to 12 000 SEK, and the difference is what Skatteverket reimburses the installer.
The grön teknik reduction only applies if the installer is properly certified and submits the application correctly. Laddboxkillarna handle this end-to-end as part of the install. If you're considering a DIY install or a non-certified electrician, you'll lose access to the 50 percent reduction — which makes the "save money by installing it yourself" math much harder.
10:30 — Done
By 10:30 Magnus was packing up. Total time on site: 2 hours 45 minutes, including ~30 minutes of app configuration that I'd normally expect to wrestle with for an hour solo. The carport had a fully functional Zaptec Go 2, the fuse box had new 20A breakers, the load balancer was reading current and scheduling charging against Vattenfall's spot prices, and the storage room looked exactly as it did when we started.
What Stood Out About Working with Laddboxkillarna
A few specifics worth calling out, because they're the things that distinguished this from a generic electrician booking:
- On time, every time. 15 minutes early to start, and the 10:30 finish was inside the original estimate. No "we'll need another visit" extensions
- Genuine explanation of every step. Before, during, and after each phase, Magnus paused to walk me through what was happening and why. Zero defensive evasiveness, zero "trust me I'm the expert" hand-waving
- They found the cheaper route. Spotting the existing conduit through the storage room saved real labor time — and that saving went to me, not into padded billing
- The fuse upgrade was offered, not assumed. Magnus explained why 20A made sense and what the alternative (sticking with 16A and a lower charging speed) would look like, then let me decide
- End-to-end ownership of the grön teknik application. I paid the reduced amount, signed nothing extra, and the 50 percent reimbursement is between Laddboxkillarna and Skatteverket
- The cleanup. A tradesperson who leaves the space cleaner than they found it is rarer than it should be
For anyone in Sweden looking at an EV charger install, this is the bar. We paid market rate after the grön teknik reduction and got top-of-market execution. I'd hire them again without a second thought.
Should You Go With Laddboxkillarna?
If you live in Sweden and you're installing an EV charger at home or for a property you rent out, the short answer is yes. The longer answer:
- For homeowners with a straightforward install: the starter package at 5 990 SEK (after grön teknik) is hard to beat on price, and you get full warranty + certified installation + Skatteverket compliance
- For homes with complex wiring (older fuse boxes, long cable runs, BRF approval needed): the dedicated EV-installer specialism pays off — they've seen every edge case
- For BRF or vacation rentals: Laddboxkillarna handles the documentation and certification needed for board approval and insurance, which a general electrician often won't
If you're elsewhere in Sweden, they install nationwide. Request a quote on laddboxkillarna.se — they'll do the site assessment and the grön teknik paperwork as part of the booking.
People Also Ask (FAQ)
How much did the EV charger install cost in Sweden?
Laddboxkillarna's all-inclusive starter package (Zaptec Go 2 charger + Perific load balancer + installation) starts at 5 990 SEK after the grön teknik tax credit. Before the 50 percent grön teknik reduction it's around 12 000 SEK. The exact final price depends on your fuse box condition, cable distance, and whether you need fuse upgrades — for our install (full new wiring, fuse upgrade from 16A to 20A, Perific load balancer) it was within the typical range.
How long does a Zaptec Go 2 install take?
Our install took about 2 hours 45 minutes from arrival to fully working — including a fuse box upgrade, exterior and interior cable routing, mounting the charger, installing the Perific load balancer, and the full app + Vattenfall integration. Simpler installs (no fuse upgrade, short cable run) can finish in around 2 hours.
What is grön teknik and how do I claim 50 percent off my EV charger?
Grön teknik is a Skatteverket tax reduction that gives 50 percent off the cost of labor and materials when installing green technology, including EV charging points (laddpunkter för elbilar). The cap is 50 000 SEK per person per year. You don't apply yourself — the certified installer applies on your behalf, and you only pay the reduced price upfront. To qualify you must own the property, use it as a primary or vacation home, and be tax-resident in Sweden.
Why do I need a load balancer with my EV charger?
A load balancer (we used the Perific) monitors total household current draw and dynamically reduces charging power if the house is approaching its main fuse limit. Without one, fast EV charging can trip the main fuse when combined with normal appliance use (oven, induction stove, heat pump). It also enables Vattenfall's Smart Charging — the load balancer talks to your utility account so charging shifts to the cheapest hourly prices automatically.
Do I need to upgrade my fuses for EV charging?
It depends on your existing setup. Our front fuses were 16A — sufficient for a Swedish home without EV charging but marginal once you add a 3-phase wallbox. Magnus upgraded the main fuses to 20A as part of the install, which gives sustained 11 kW charging headroom. A certified electrician will check your fuse box and recommend whether an upgrade is needed during the site visit.
Can I prevent strangers from plugging into my charger?
Yes. The Zaptec Go 2 supports authentication via the Zaptec app, an RFID tag, or charging schedules — you can lock the charger so it only authorizes known users. We set ours to app-only authorization plus restricted charging hours, which means a plugged-in cable does nothing without one of our phones nearby.
Does the Zaptec Go 2 work with Tibber, Vattenfall, and other Swedish utilities?
Yes. The Zaptec Go 2 integrates with major Swedish utilities for smart charging — we connected it to our Vattenfall account so charging automatically scheduled during the cheapest spot-price hours. It also works with Tibber and other providers that expose hourly price data.
Is Laddboxkillarna available outside Uppsala?
Yes — Laddboxkillarna installs across all of Sweden with over 40 certified electricians on staff and 30 000+ installations completed. They started in 2021 and have grown into one of the country's largest EV charger installers.